> ## Documentation Index
> Fetch the complete documentation index at: https://docs.zenrows.com/llms.txt
> Use this file to discover all available pages before exploring further.
# How to Integrate Zapier With ZenRows
> Set up ZenRows and Zapier integration to automate web scraping tasks across your apps. Build no-code workflows for data extraction and syncing.
ZenRows integrates seamlessly with Zapier to automate scraping tasks across several applications. This guide will walk you through a practical example, showing you how to integrate Zapier with ZenRows to efficiently automate your web scraping tasks.
## What Is Zapier & Why Integrate It with ZenRows?
Zapier is a no-code platform that automates repetitive tasks by linking applications into workflows. Each workflow consists of a trigger and one or more actions. Triggers can be scheduled, event-based, or manually initiated using webhooks.
When combined with ZenRows, Zapier enables full automation of your scraping process. Here are some key benefits:
* **Scheduled scraping**: Run scraping tasks on a regular schedule, such as hourly or daily, without manual input.
* **No-code setup**: Create scraping workflows without needing to write or maintain code.
* **Simplified scraping**: ZenRows handles JavaScript rendering, rate limits, dynamic content, anti-bot protection, and geo-restrictions automatically.
* **Seamless data integration**: Store results directly in tools like Google Sheets, Excel, SQL databases, or visualization platforms like Tableau.
* **Automated monitoring**: Track price changes, stock updates, and website modifications with minimal effort.
This integration is ideal for businesses that want to scale scraping workflows quickly and reliably.
## Watch the Video Tutorial
Learn how to set up the Zapier ↔ ZenRows integration step-by-step by watching this video tutorial:
## ZenRows Integration Options
With ZenRows, you can perform various web scraping tasks through Zapier:
* **Scraping a URL**: Returns a full-page HTML from a given URL.
* **Scraping a URL With CSS Selectors**: Extracts specific data from a URL based on given selectors.
* **Scraping a URL With Autoparse**: Parses a web page automatically and returns relevant data in JSON format.
The autoparse option only works for some websites. Learn more about how it works in the [Autoparse FAQ](/universal-scraper-api/faq#what-is-autoparse).
## Real-World Integration
In this guide, we'll use Zapier's schedule to automate web scraping with ZenRows' autoparse integration option. This setup will enable you to collect data at regular intervals and store it in a Google Sheet.
### Step 1: Create a new trigger on Zapier
1. Log in to your Zapier account at Zapier.
2. Click `Create` at the top left and select `Zap`.
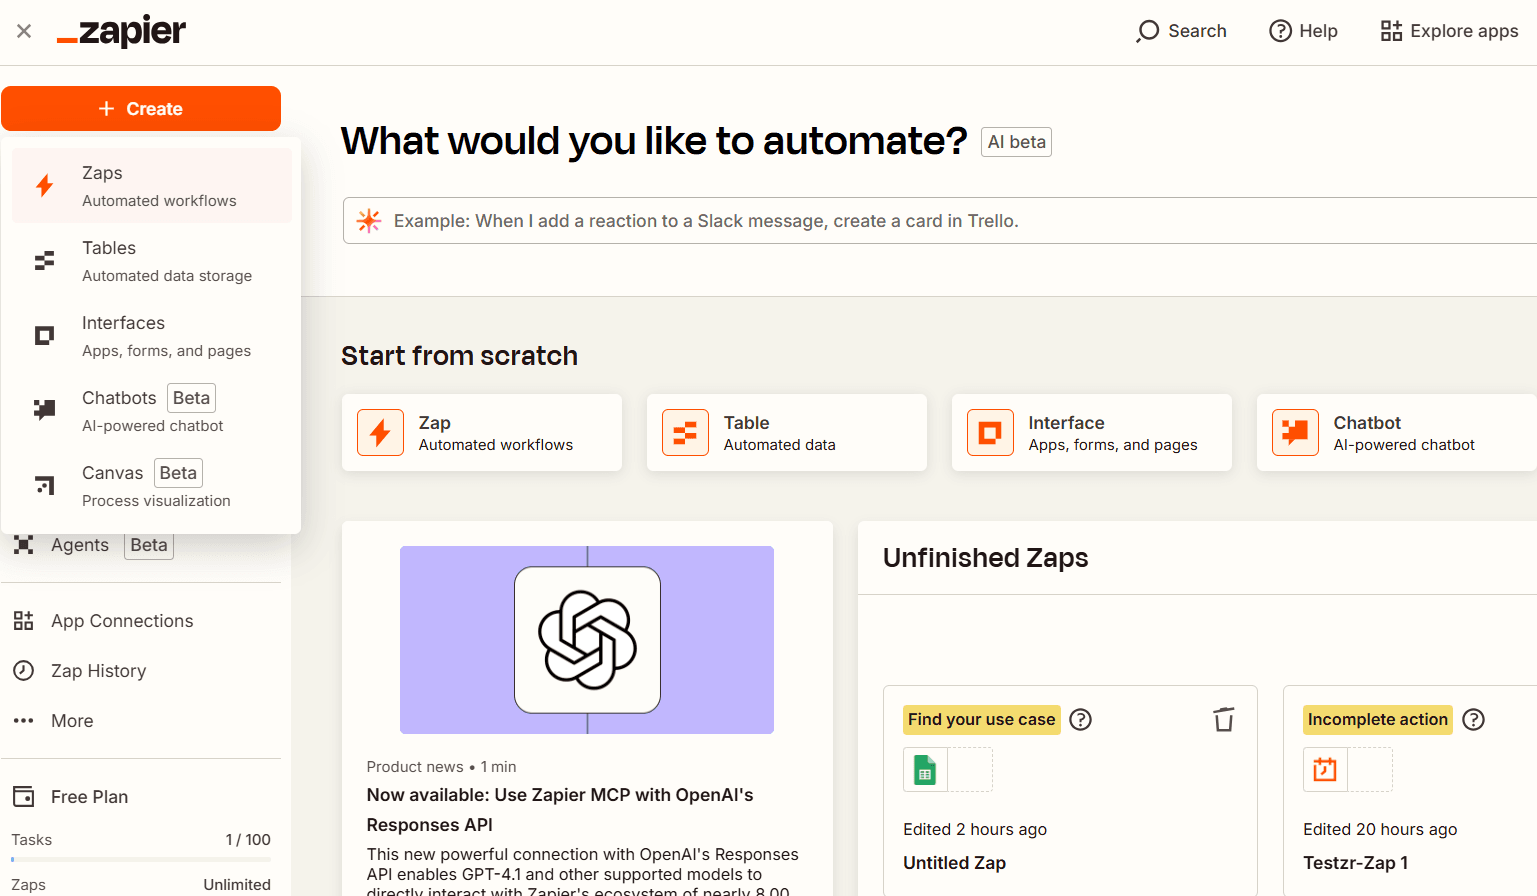 3. Click `Untitled Zap` at the top and select `Rename` to give your Zap a specific name.
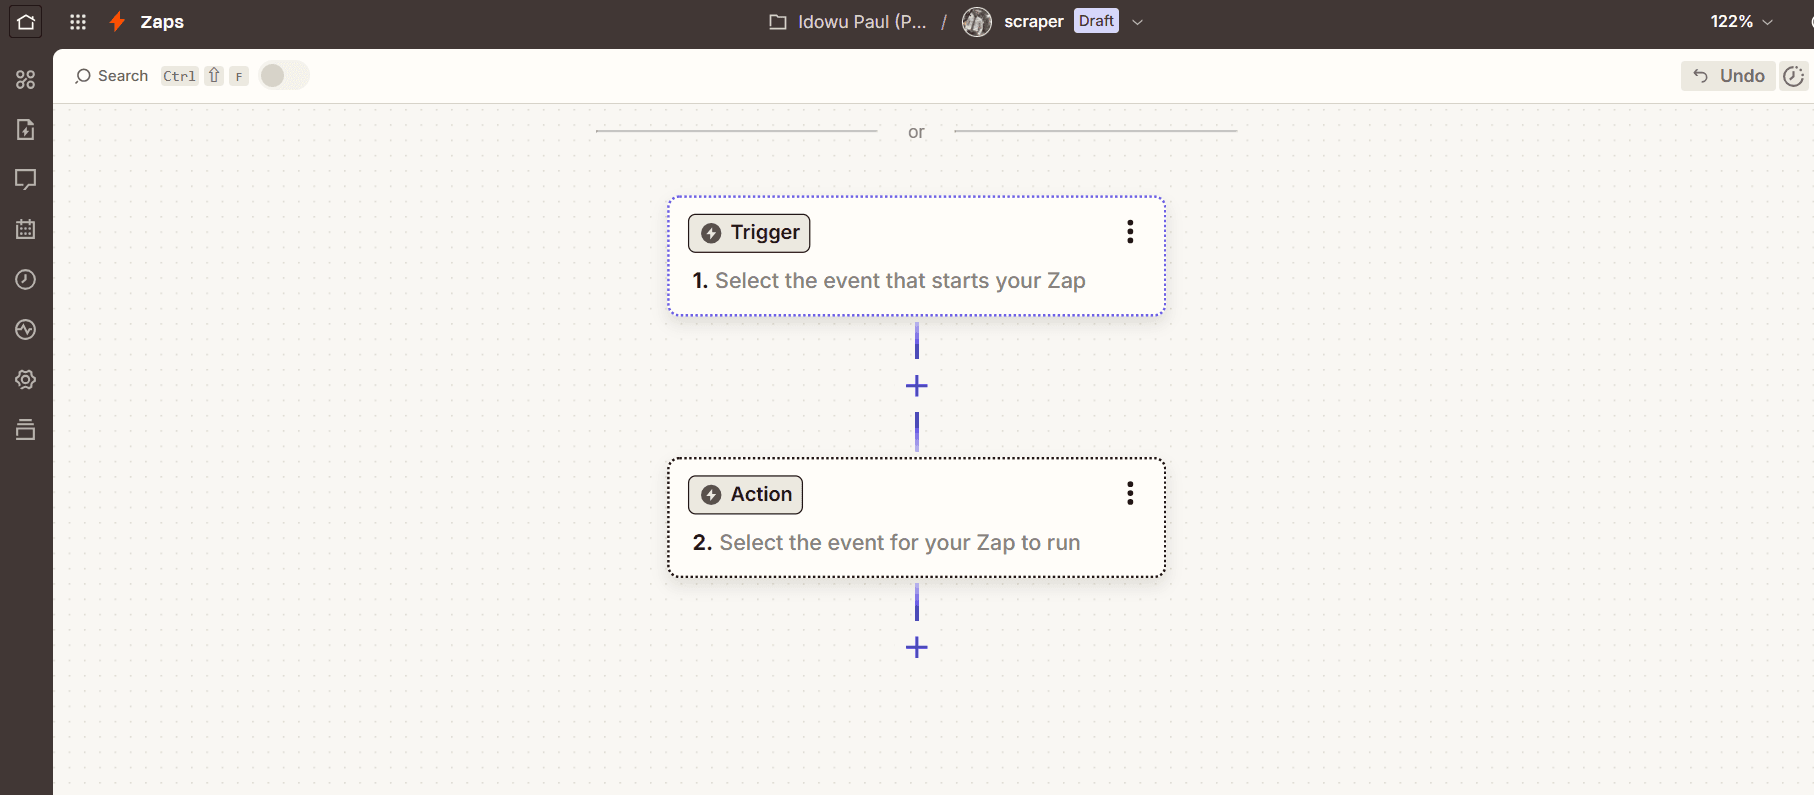
4. Click `Trigger`.
3. Click `Untitled Zap` at the top and select `Rename` to give your Zap a specific name.
4. Click `Trigger`.
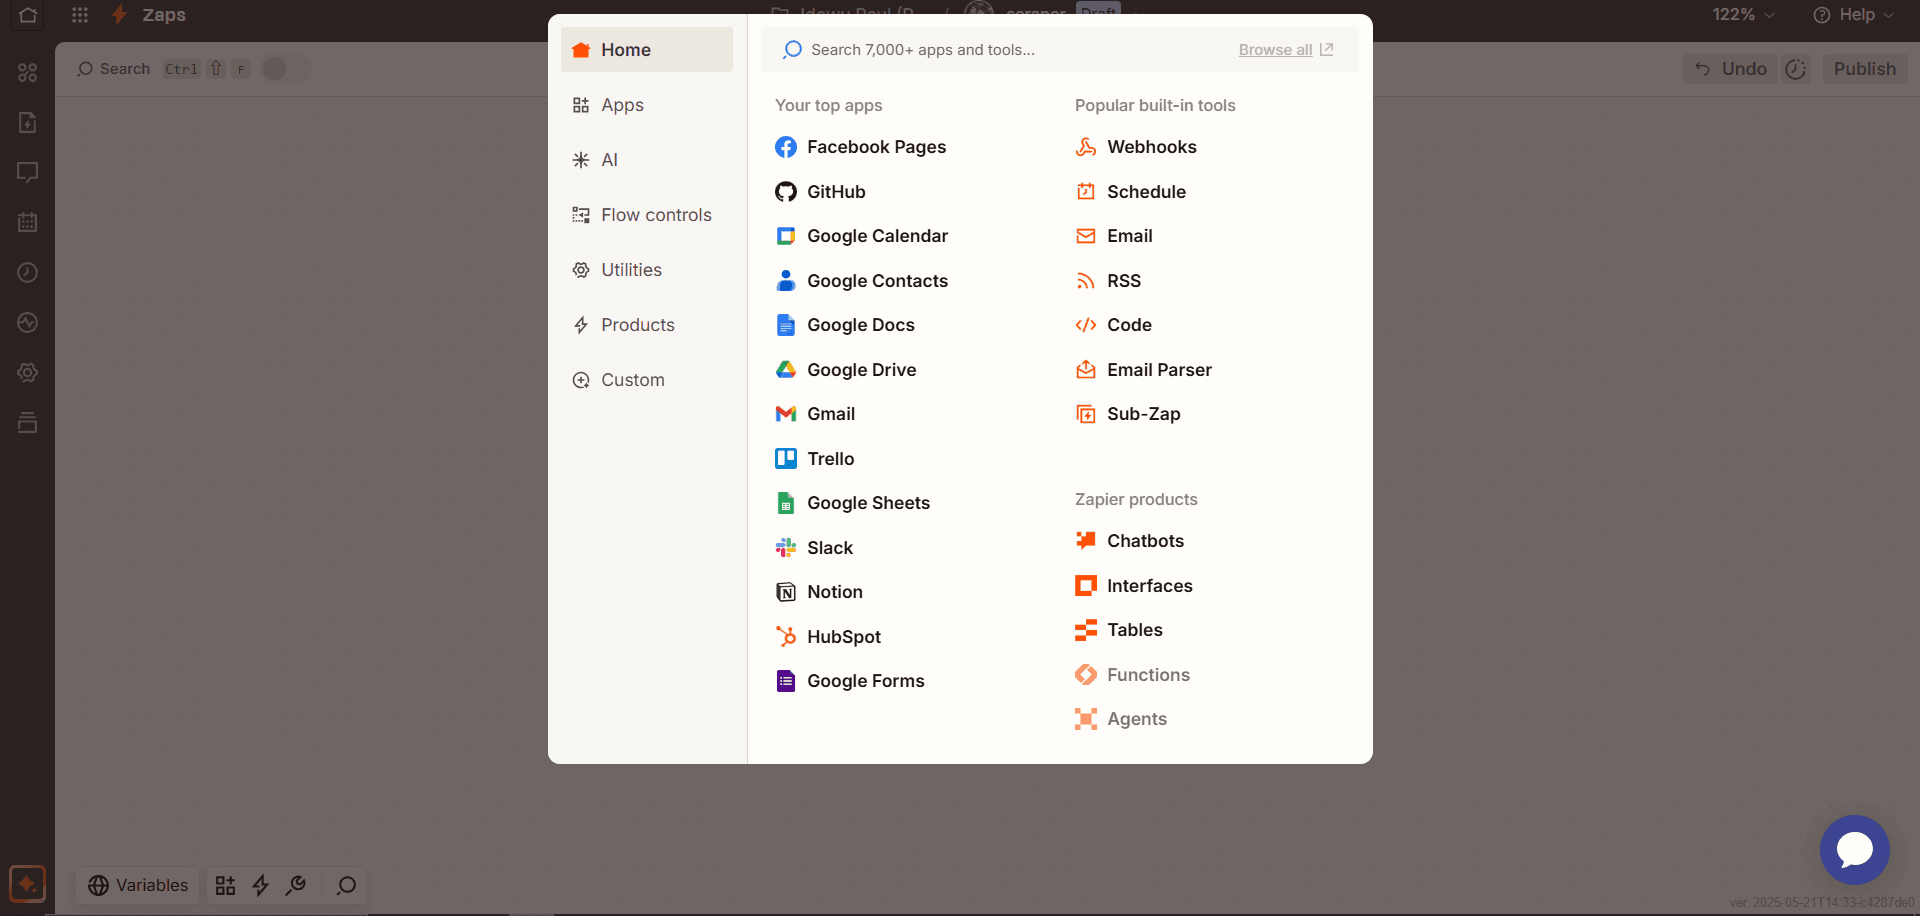
 5. Select `Schedule` to create a scheduled trigger.
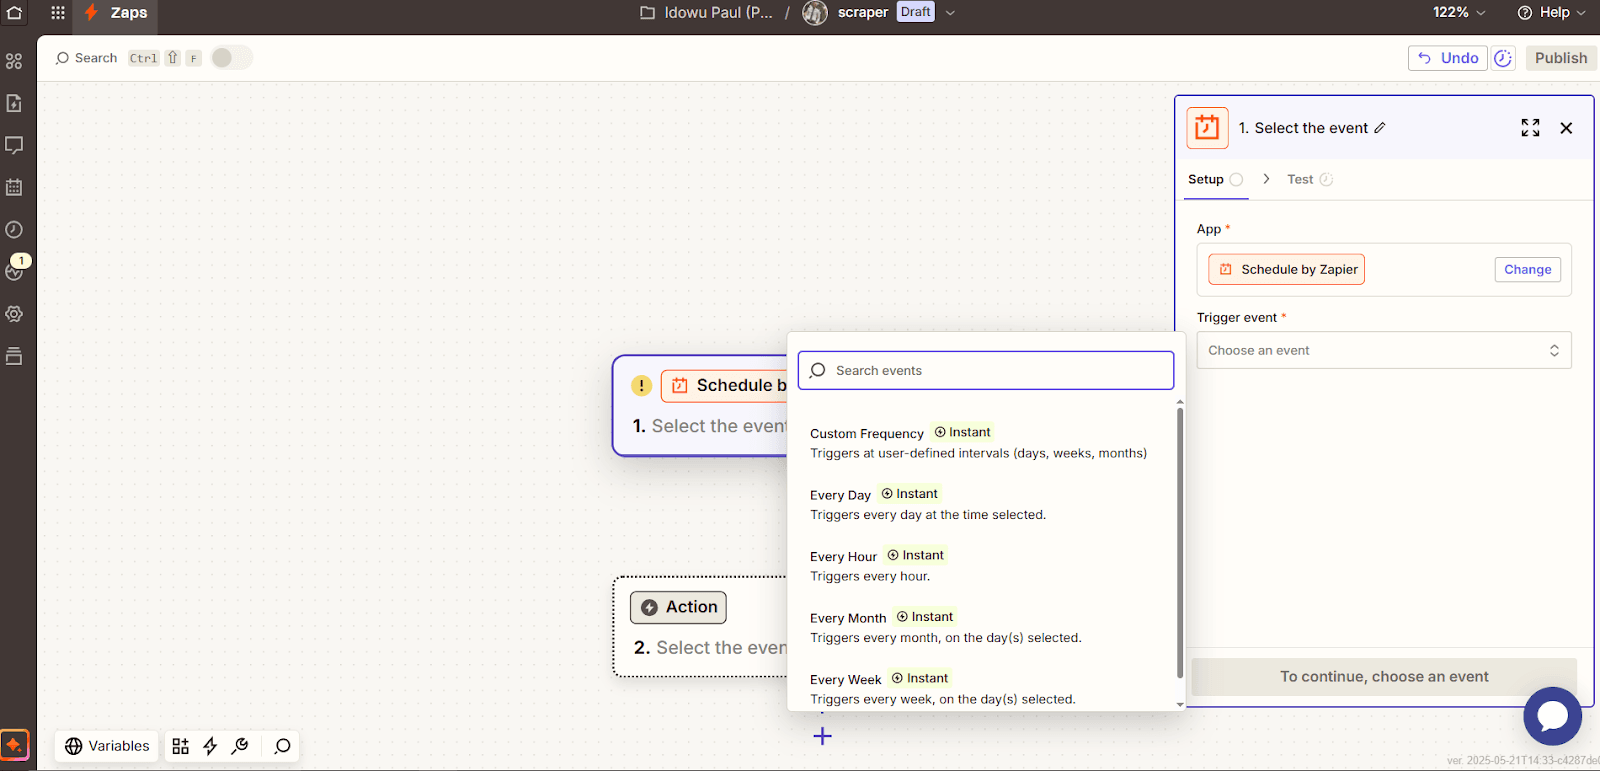
 6. Click the `Choose an event` dropdown and choose a frequency. You can customize the frequency or choose from existing ones (e.g., "Every Day").
 7. Click `Continue`.
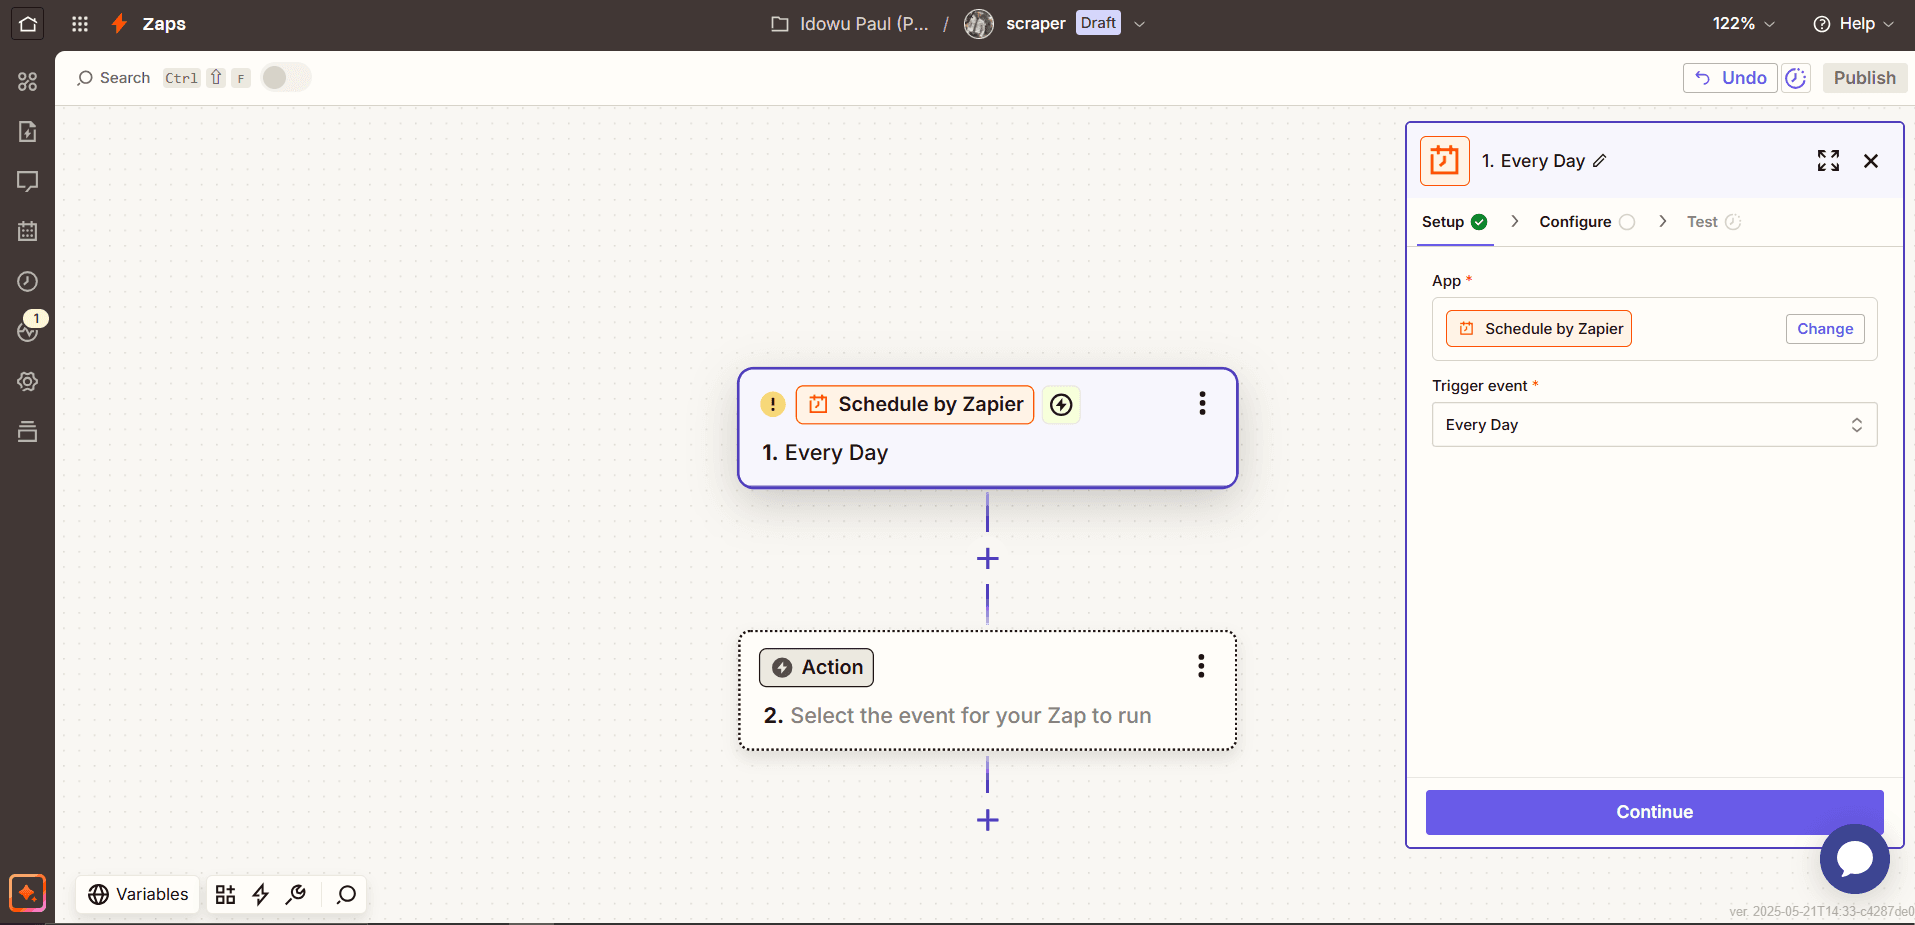 8. Click the `Time of the day` dropdown and choose a scheduled time for the trigger, or click the option icon to customize.
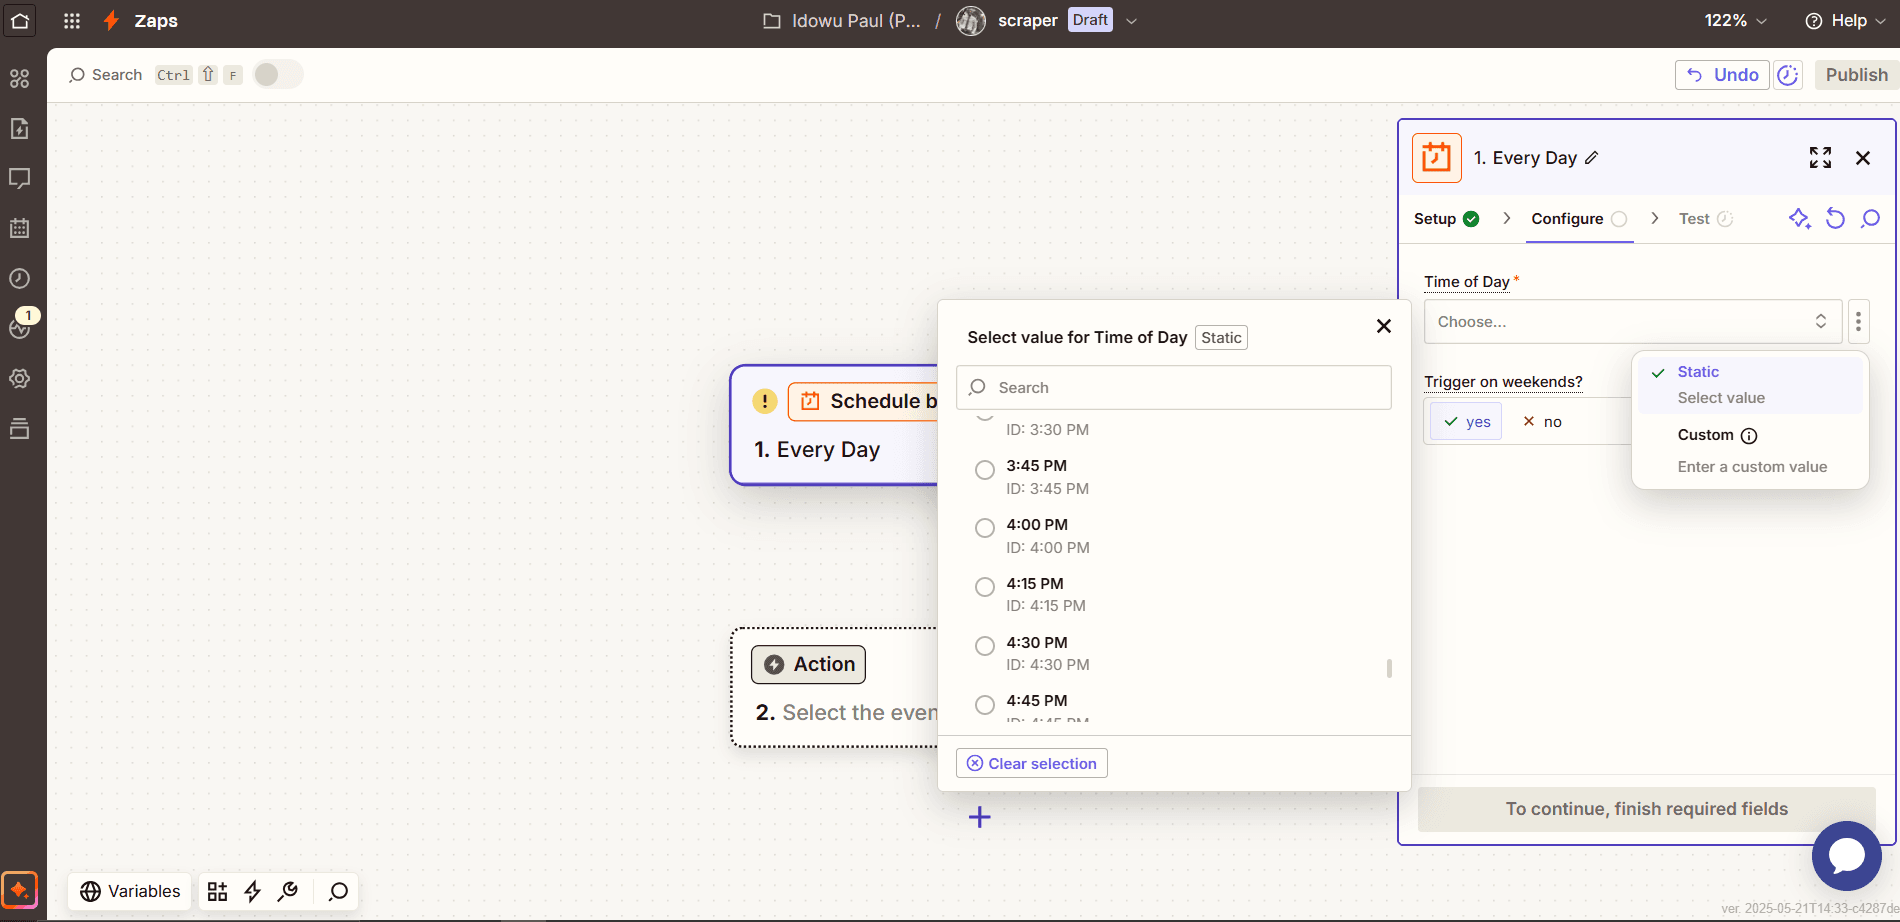 9. Click `Continue`.
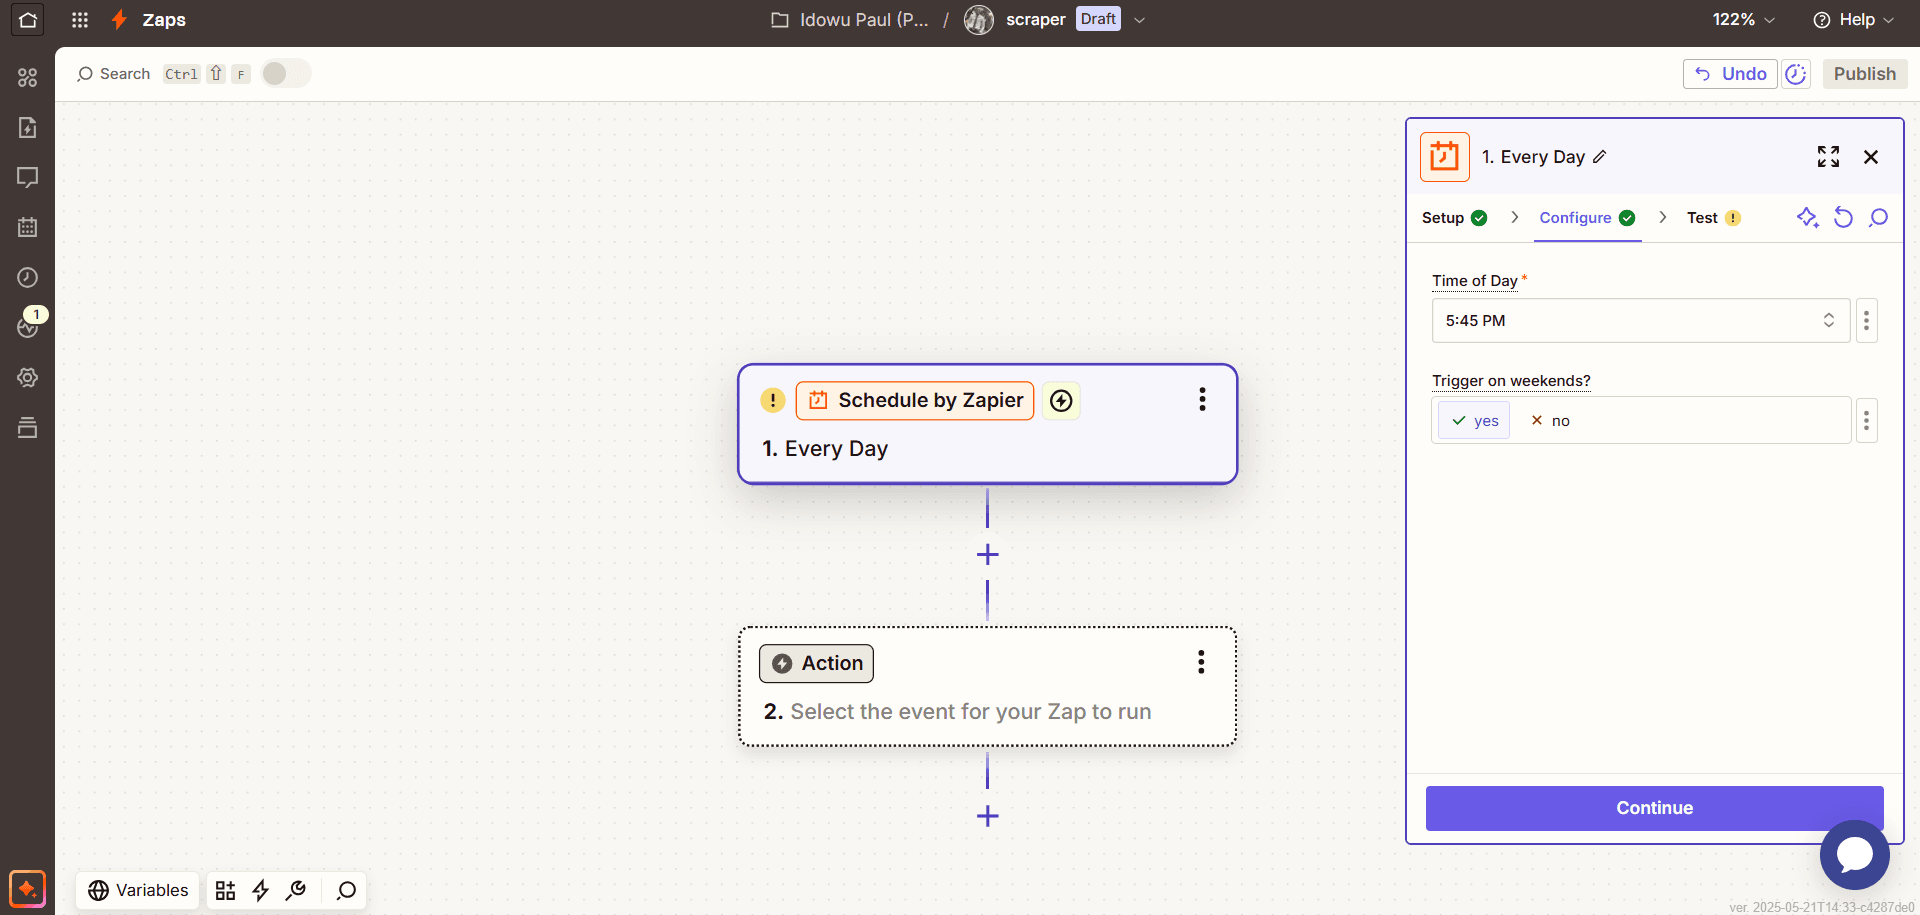 10. Click `Test trigger` and then `Continue with selected record`.
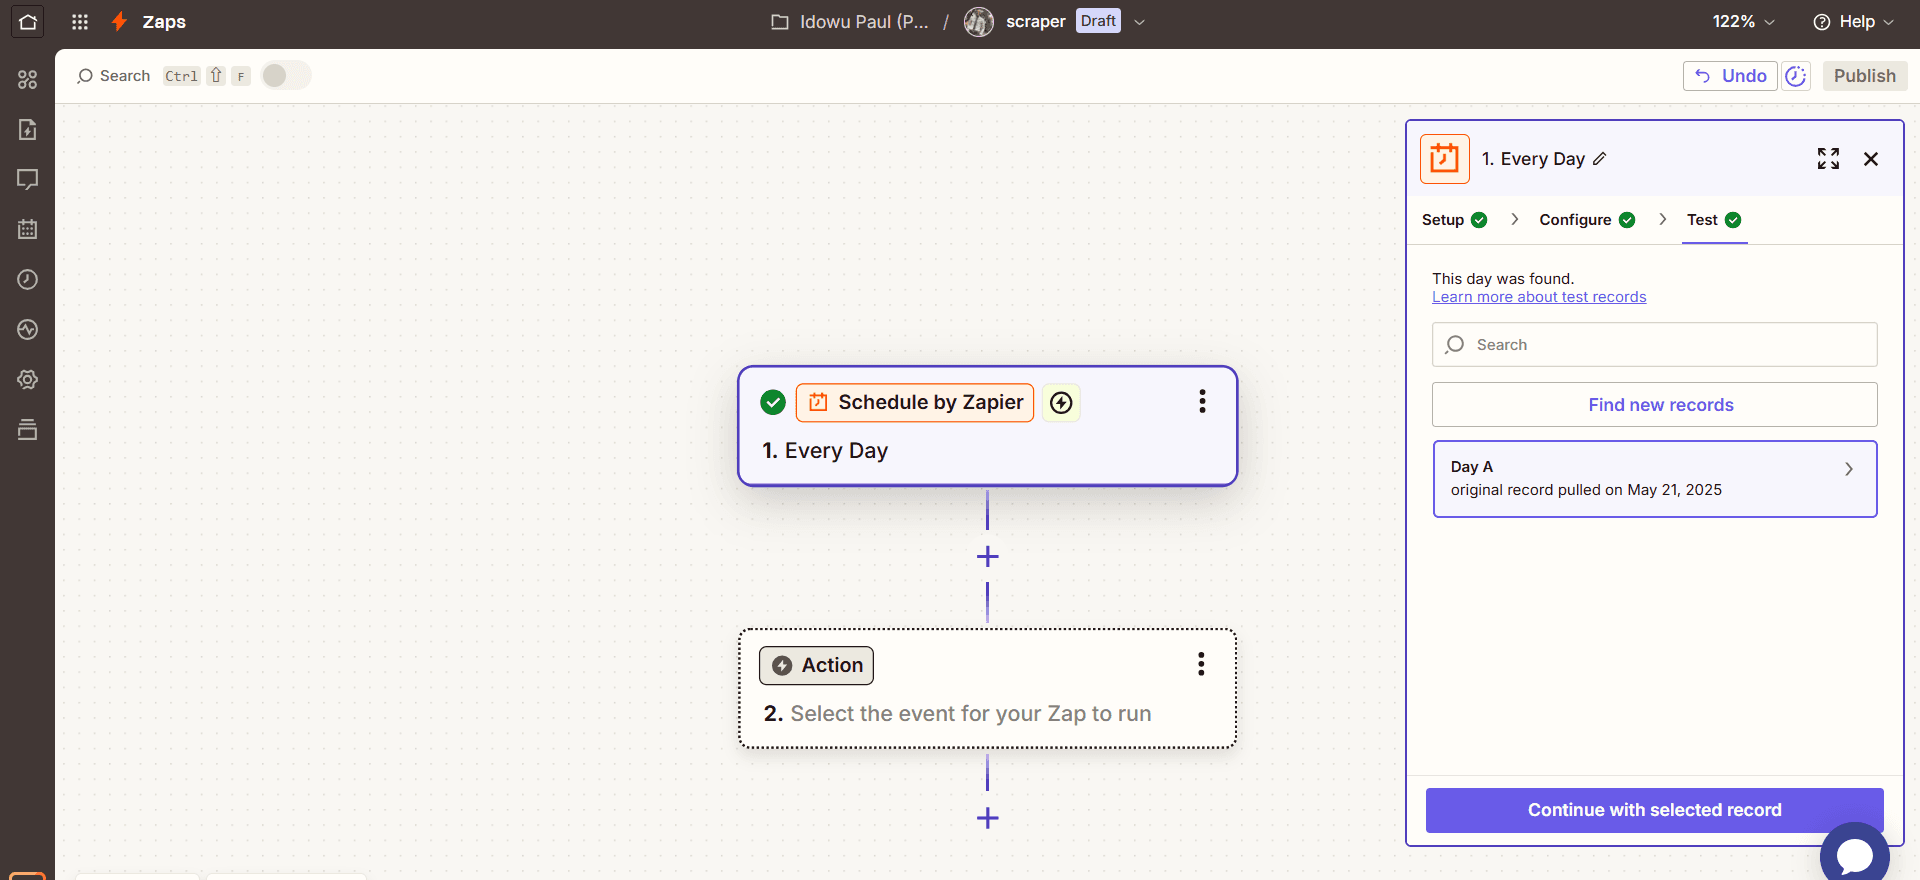 ### Step 2: Add ZenRows Scraping Action
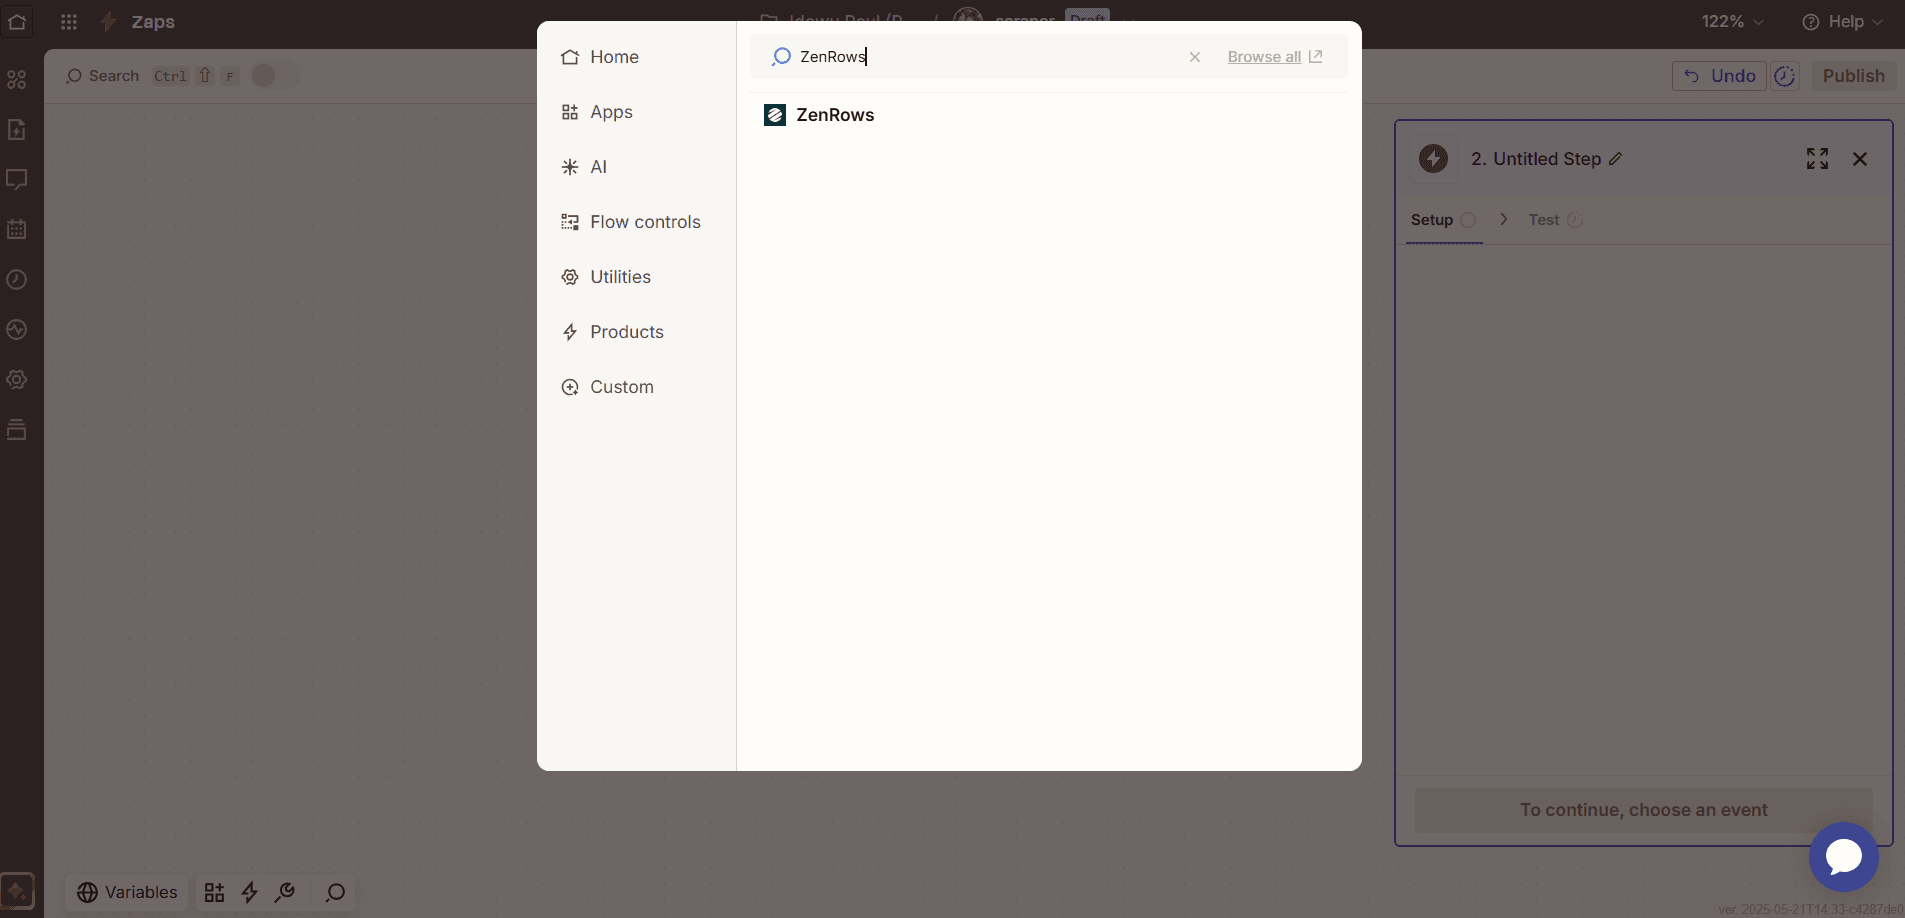
1. Type `ZenRows` in the search bar and click it when it appears.
### Step 2: Add ZenRows Scraping Action
1. Type `ZenRows` in the search bar and click it when it appears.
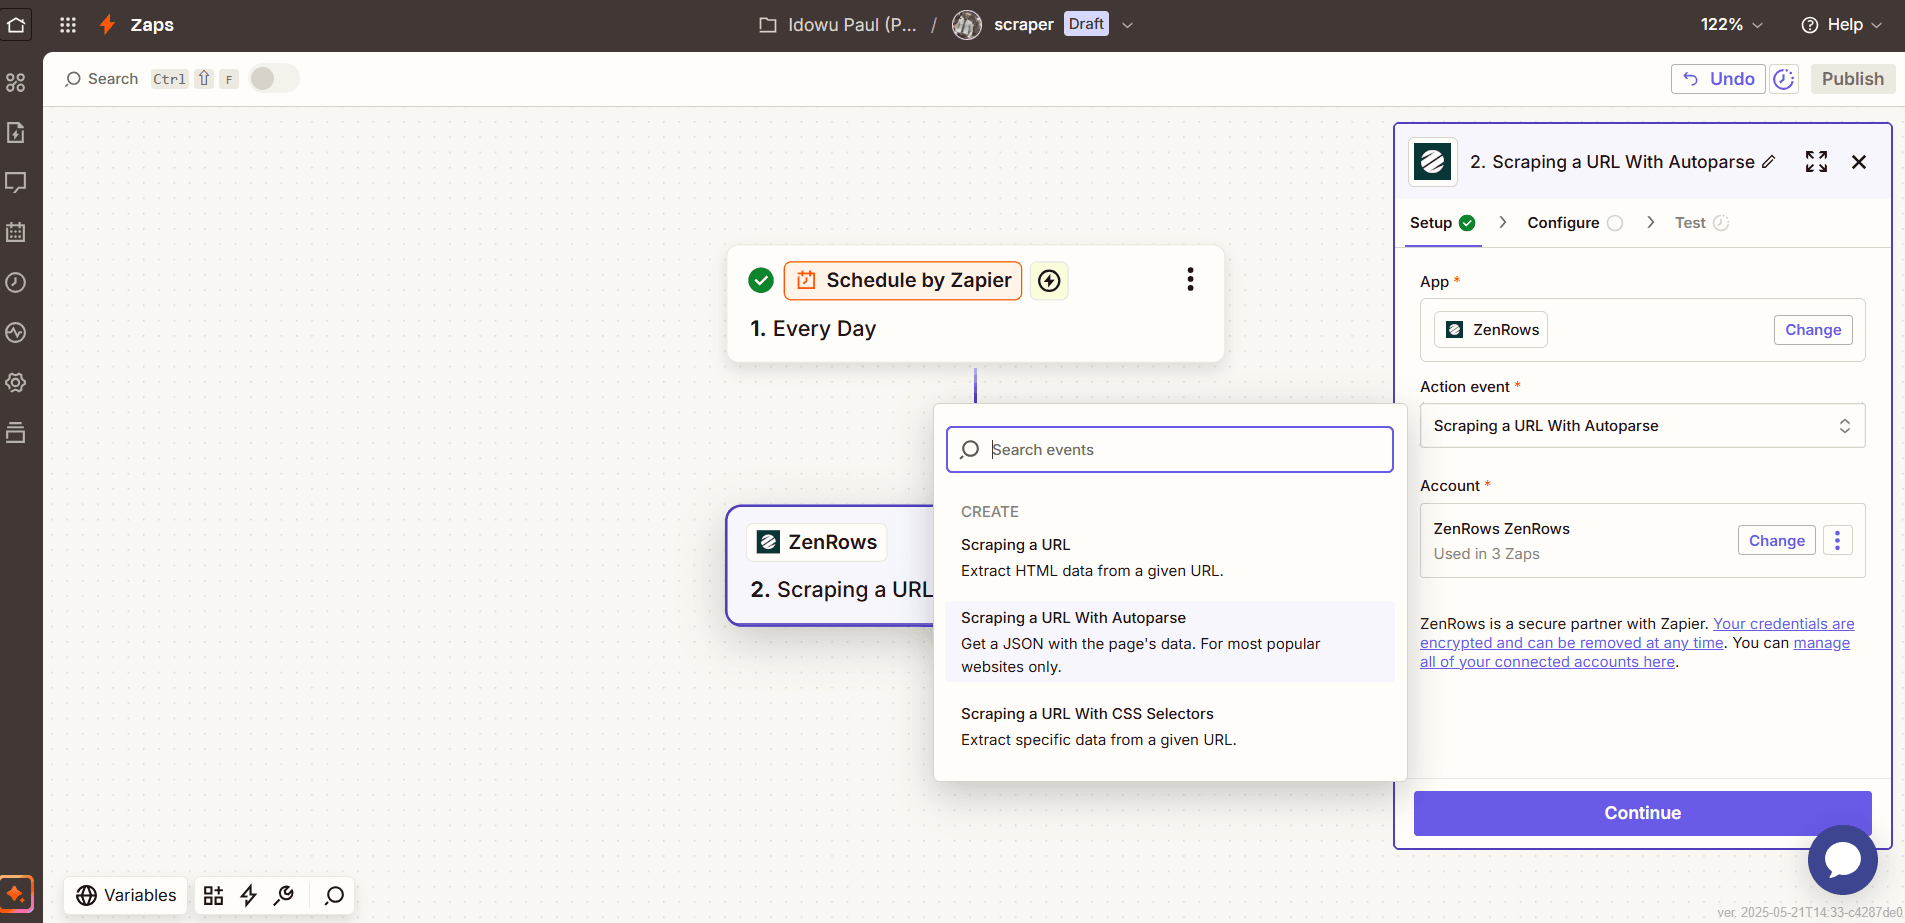
 2. Click the `Action event` dropdown and select `Scraping a URL With Autoparse`. Then click `Continue`.
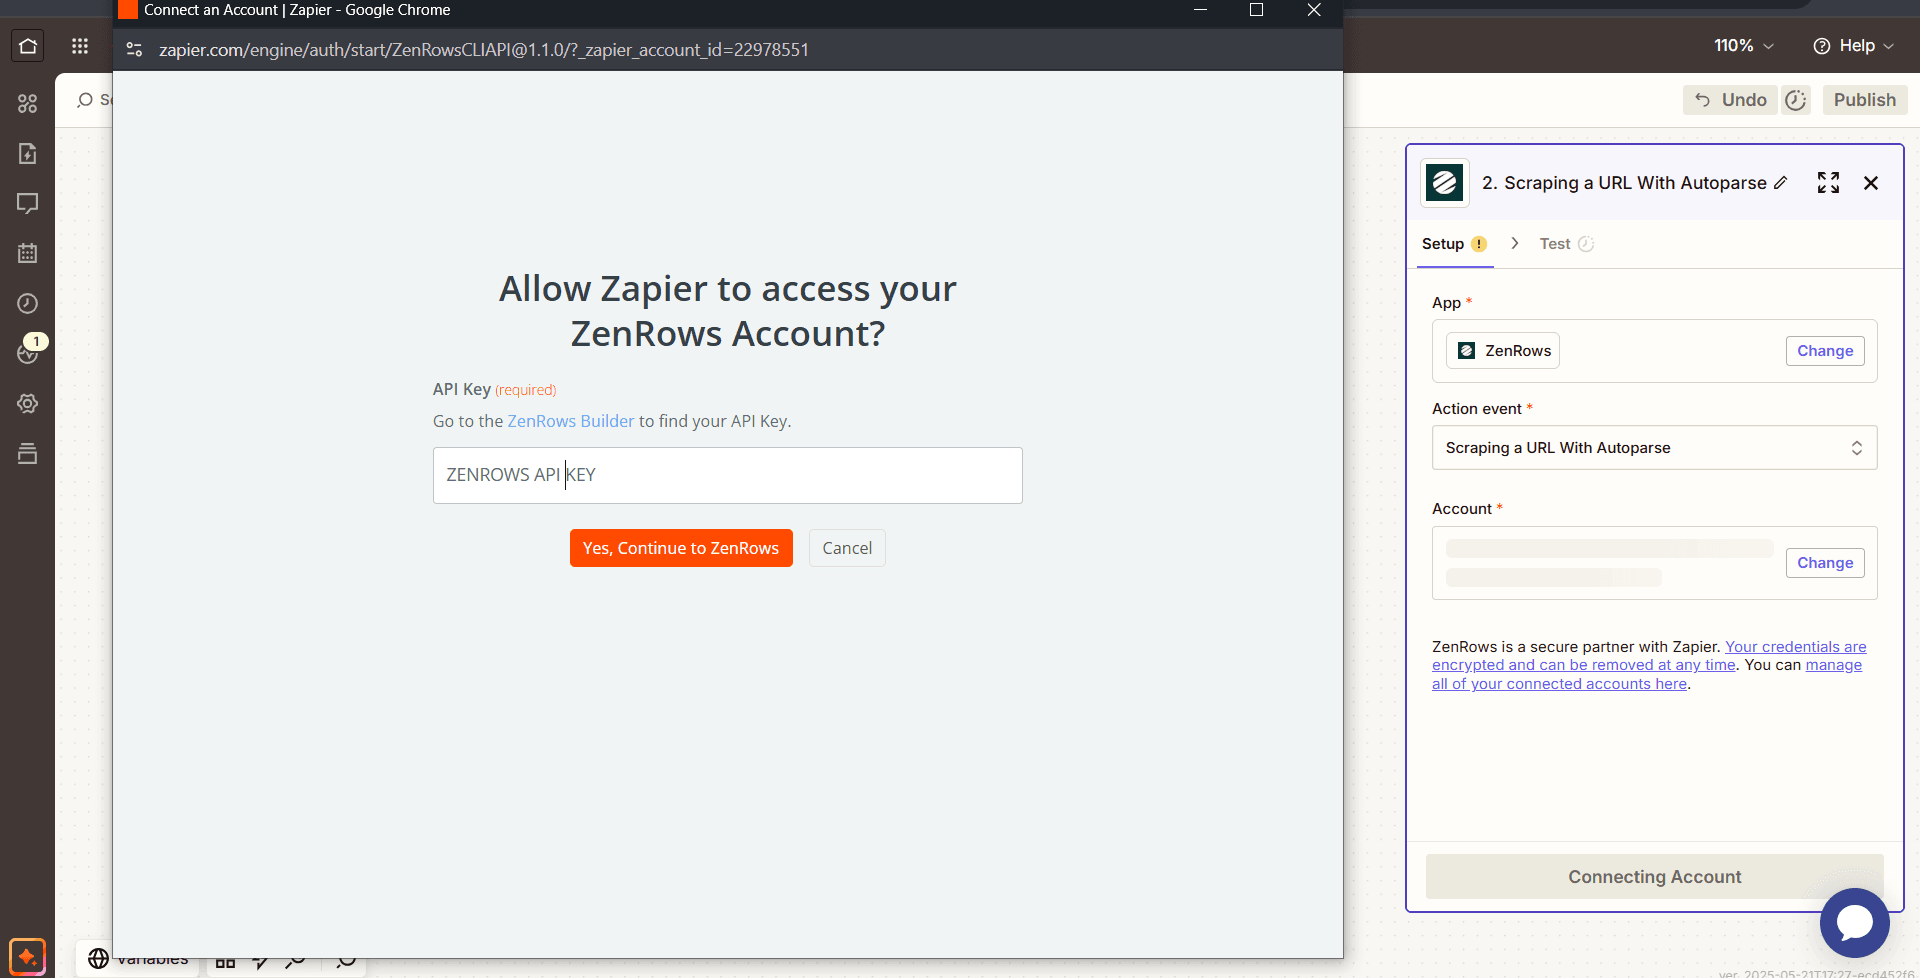
 3. Click the `Connect ZenRows` box and paste your ZenRows API key in the pop-up box. Click `Yes, Continue to ZenRows`, then `Continue`.
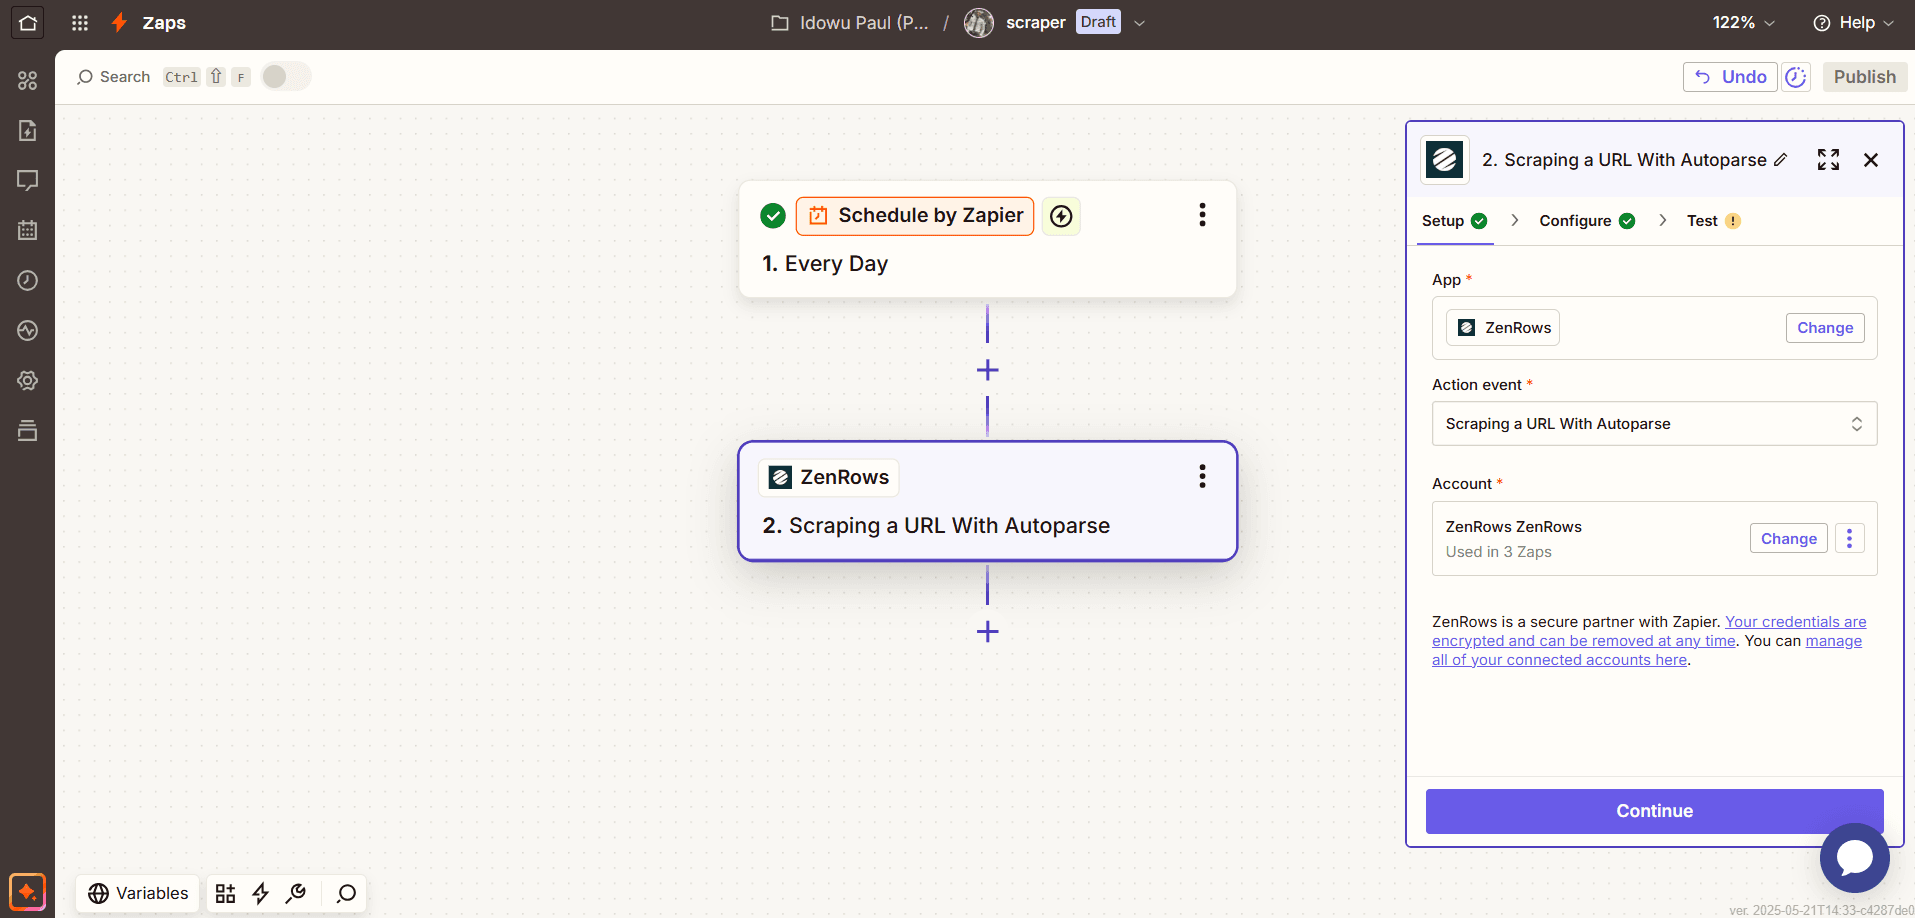 4. Paste the following URL in the URL box: `https://www.amazon.com/dp/B0DKJMYXD2/`.
5. Select `True` for **Adaptive Stealth Mode** and click `Continue`.
4. Paste the following URL in the URL box: `https://www.amazon.com/dp/B0DKJMYXD2/`.
5. Select `True` for **Adaptive Stealth Mode** and click `Continue`.
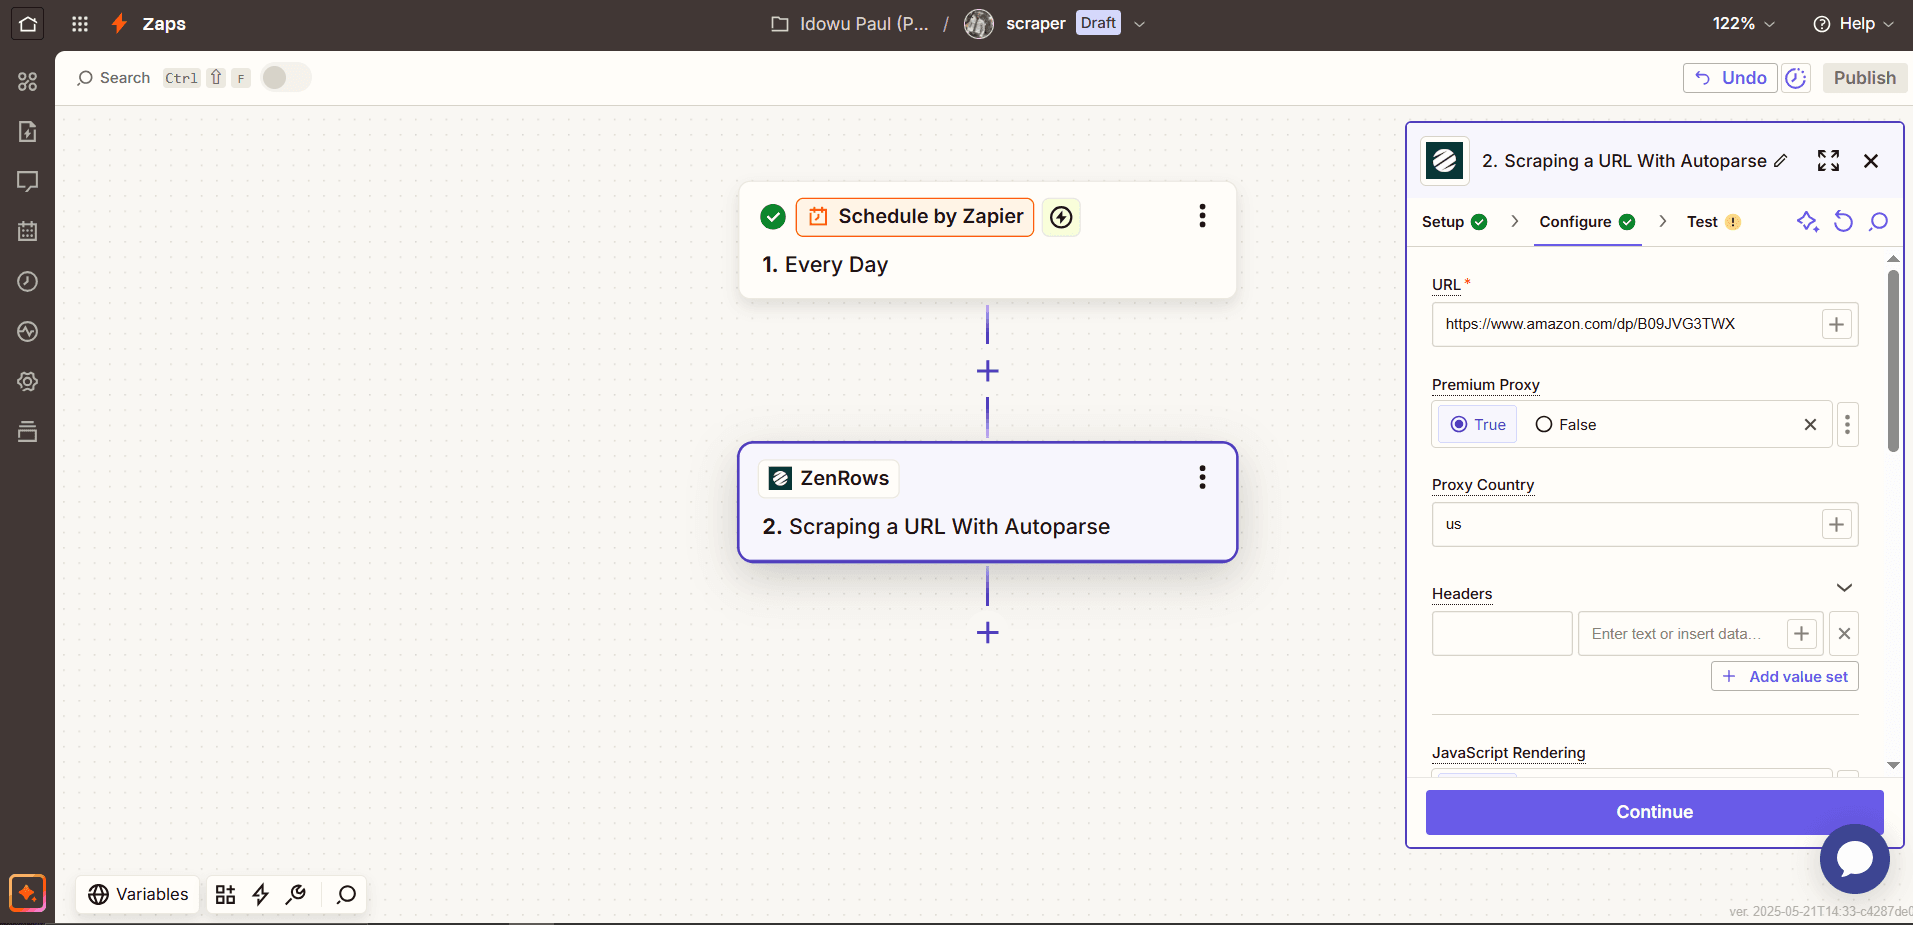 For more information about Adaptive Stealth Mode, [click here](https://docs.zenrows.com/universal-scraper-api/features/adaptive-stealth-mode).
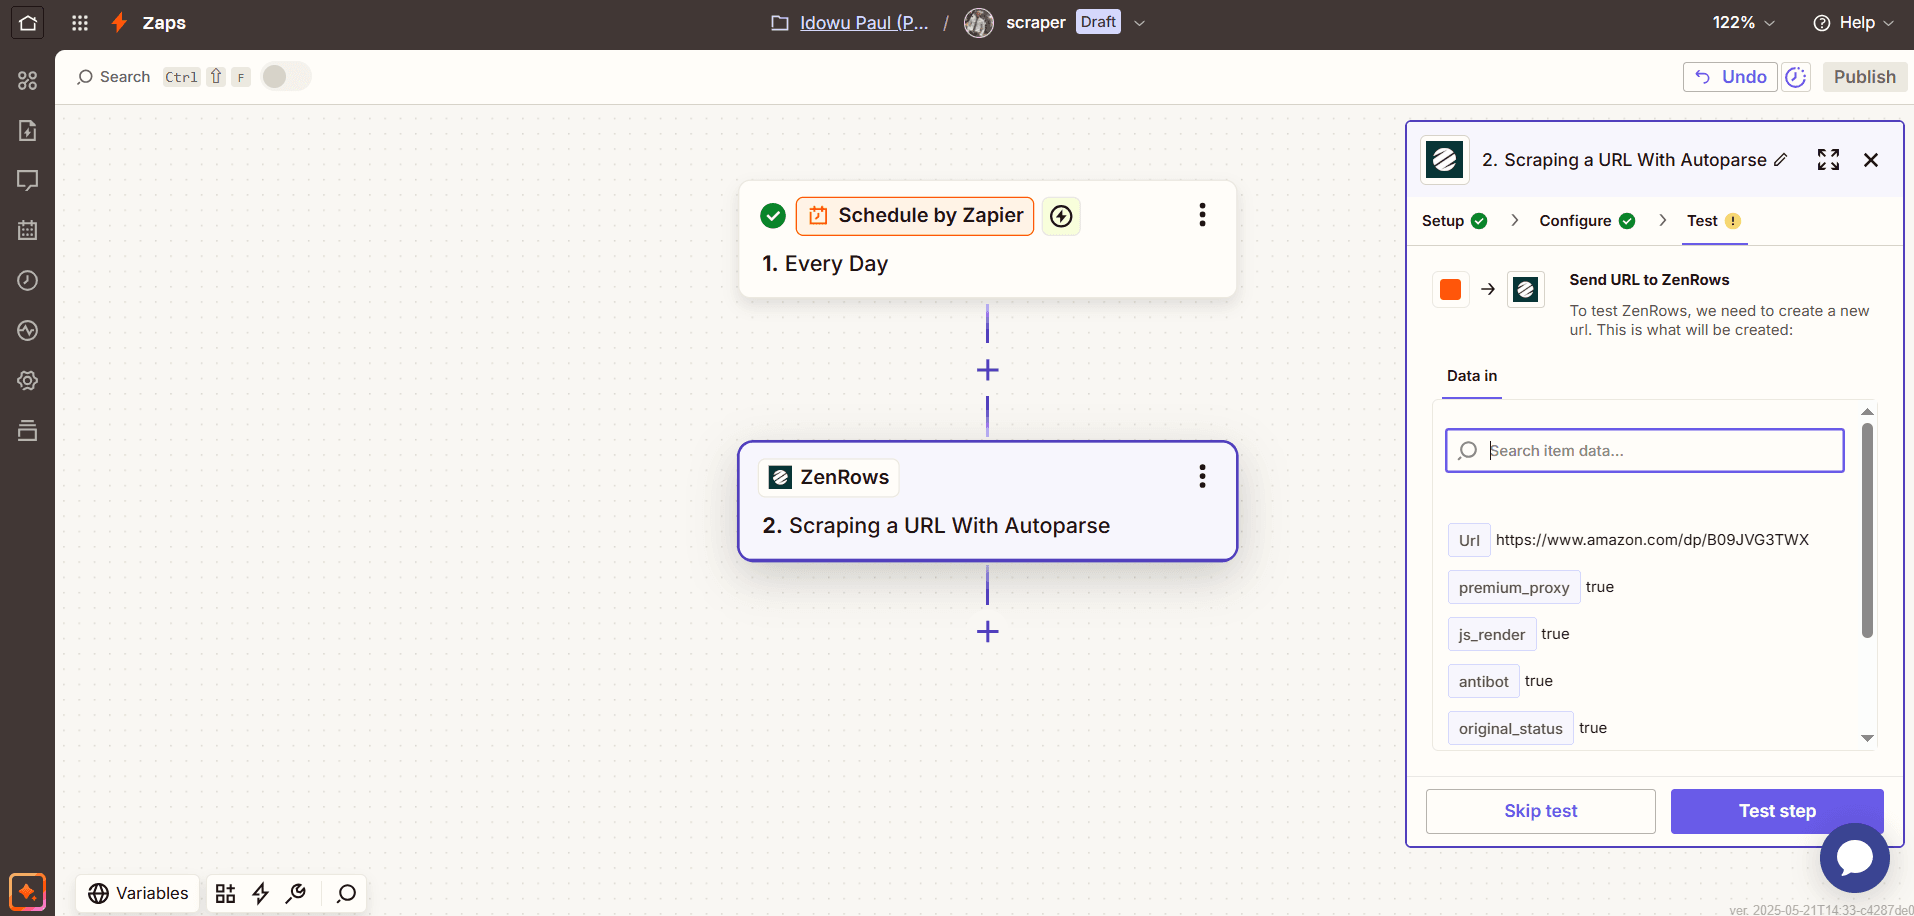
6. Click `Test step` to confirm the integration and pull initial data from the page.
For more information about Adaptive Stealth Mode, [click here](https://docs.zenrows.com/universal-scraper-api/features/adaptive-stealth-mode).
6. Click `Test step` to confirm the integration and pull initial data from the page.
 ### Step 3: Save the extracted data
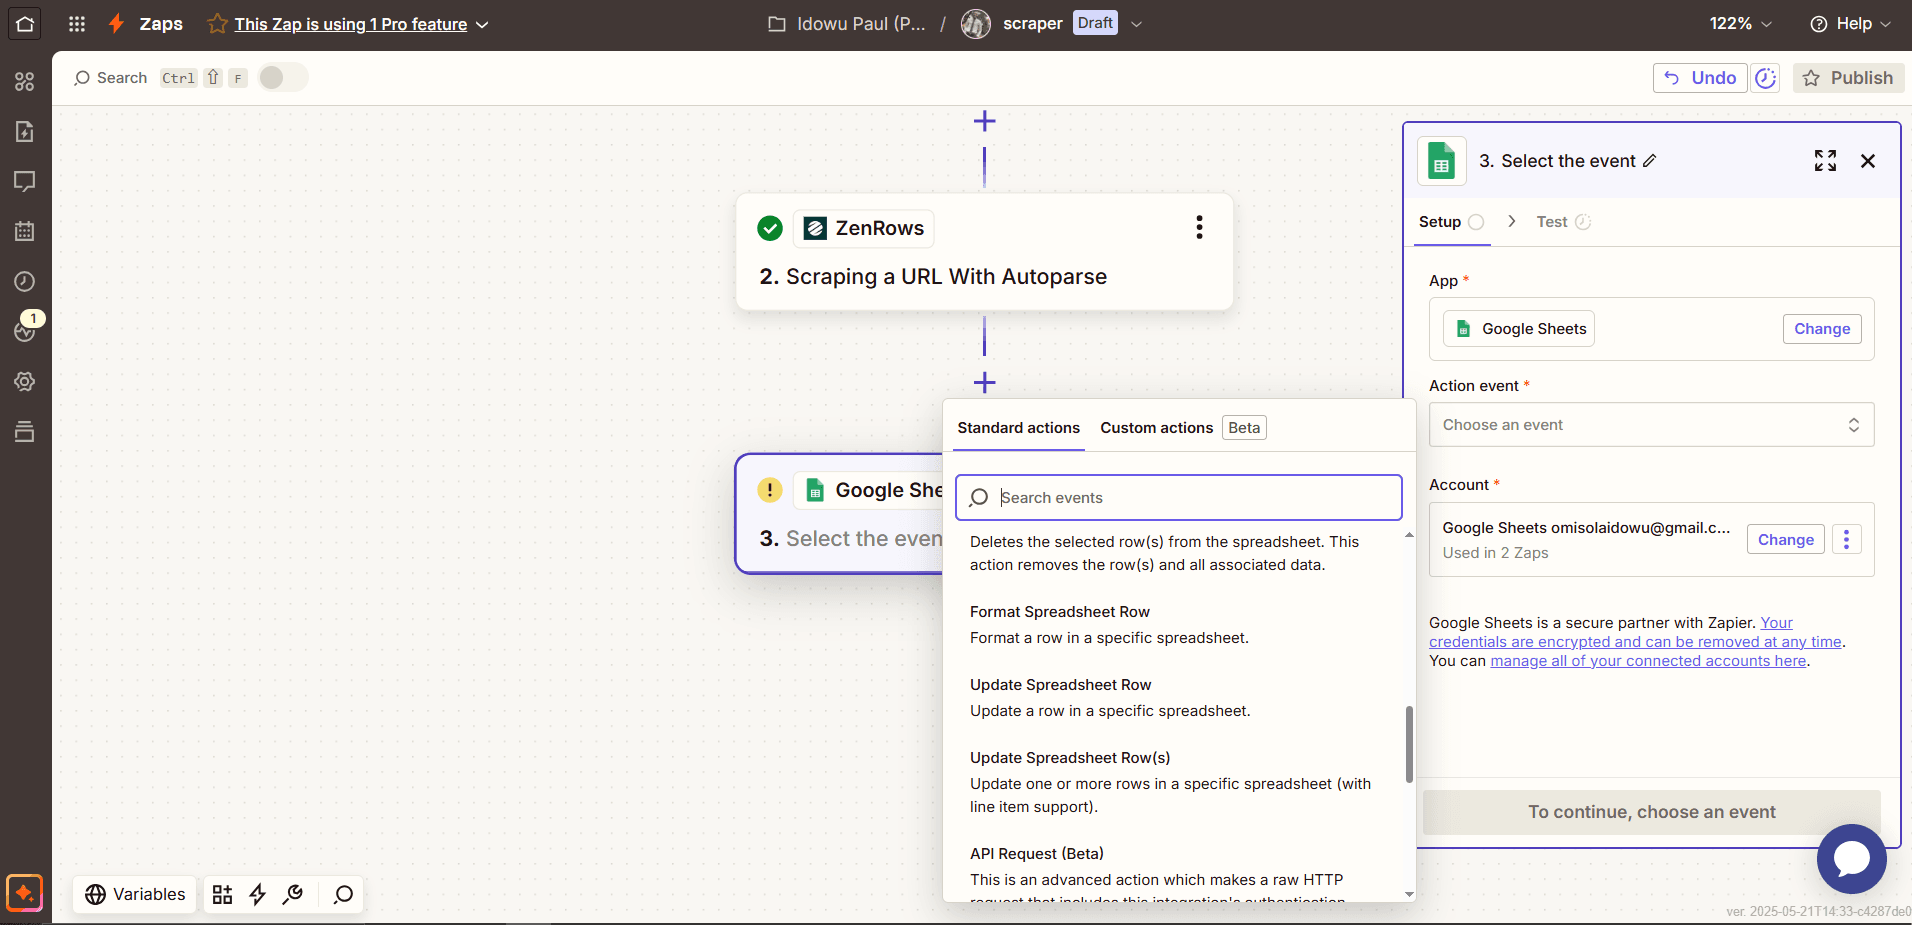
1. Click the `+` icon below the ZenRows step. Then, search and select `Google Sheets`.
2. Click the `Action event` dropdown and select `Create Spreadsheet Row`.
3. Click the `Account` box to connect your Google account, and click `Continue`.
### Step 3: Save the extracted data
1. Click the `+` icon below the ZenRows step. Then, search and select `Google Sheets`.
2. Click the `Action event` dropdown and select `Create Spreadsheet Row`.
3. Click the `Account` box to connect your Google account, and click `Continue`.
 4. Add the following column names to the spreadsheet you want to connect:
* Name
* Price
* Discount
* SKU
* Average rating
* Review count
* Timestamp
5. Click the `Drive` box and select your Google Sheets location. Choose the target `Spreadsheet` and `Worksheet`.
4. Add the following column names to the spreadsheet you want to connect:
* Name
* Price
* Discount
* SKU
* Average rating
* Review count
* Timestamp
5. Click the `Drive` box and select your Google Sheets location. Choose the target `Spreadsheet` and `Worksheet`.
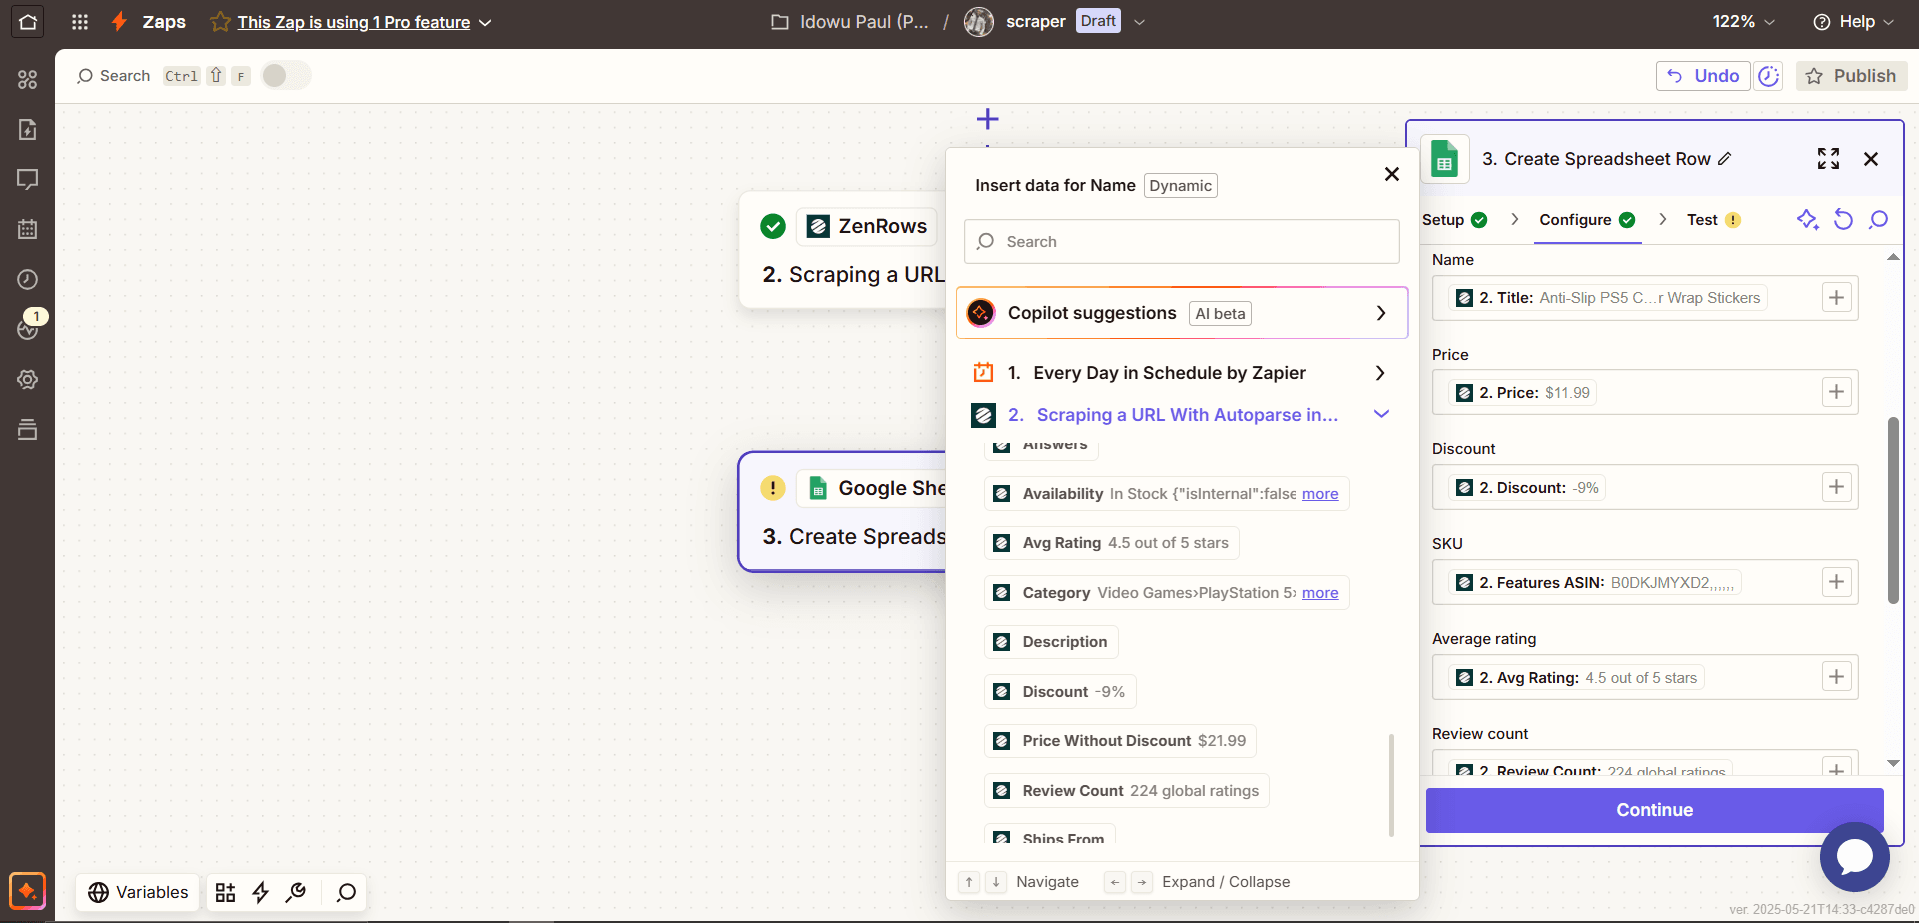
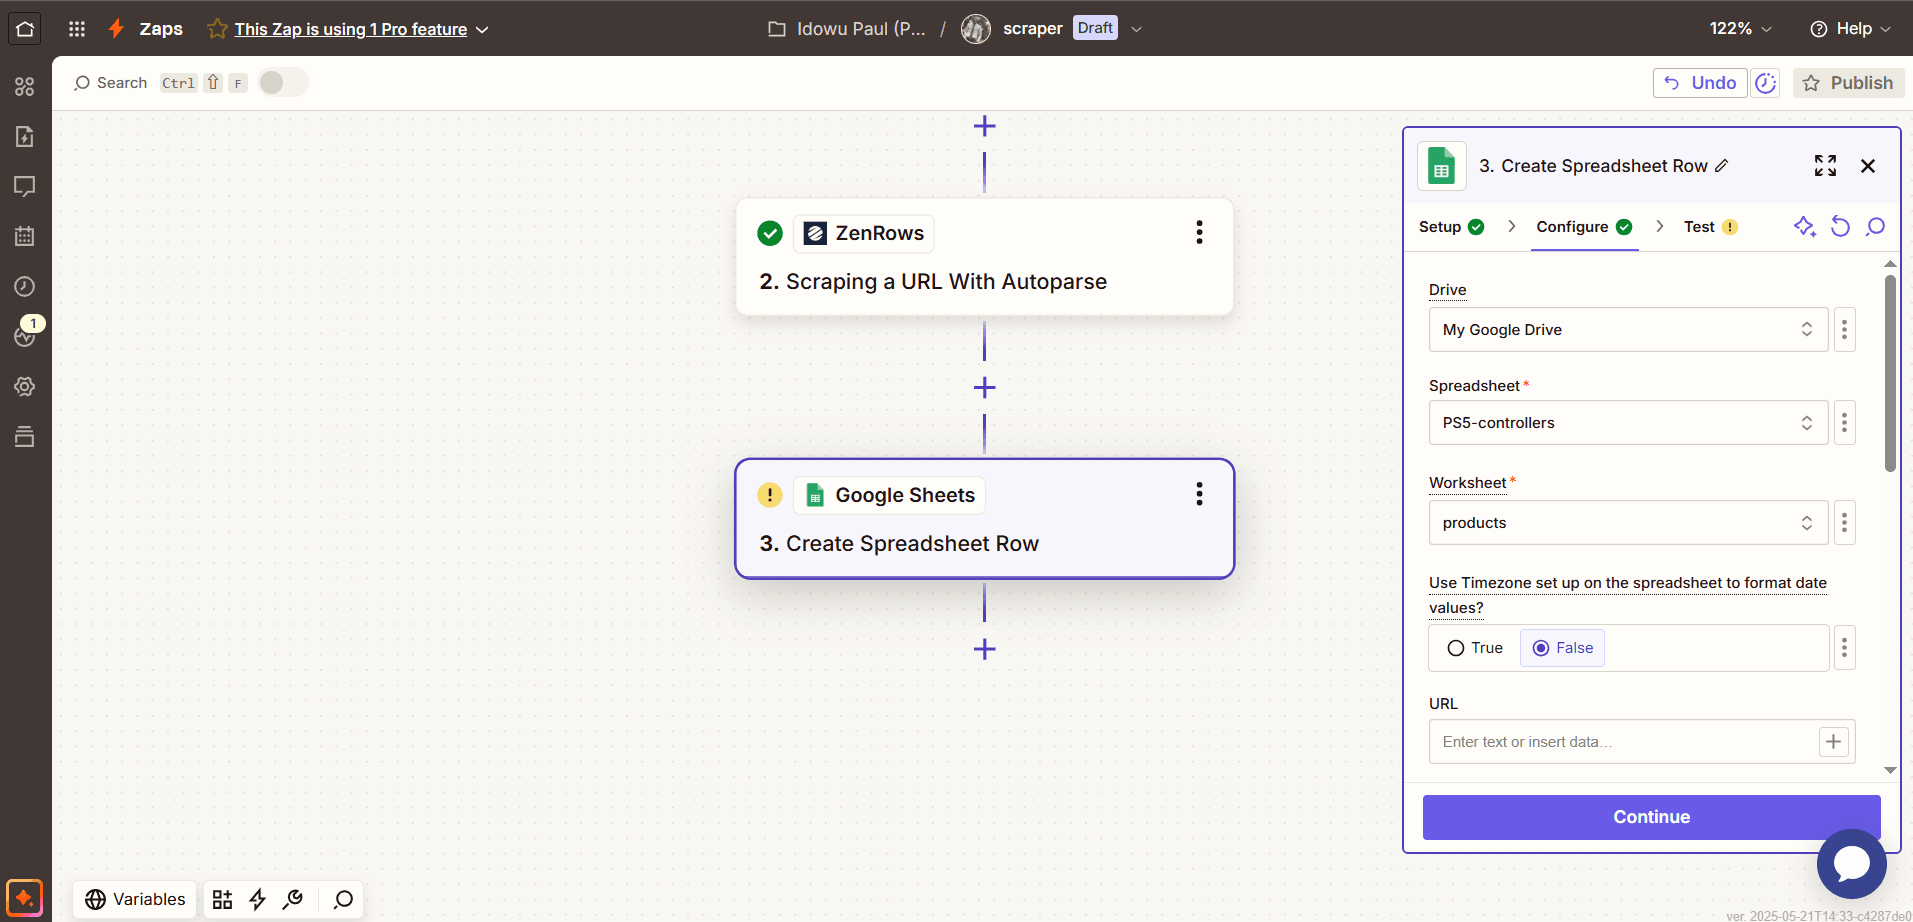 6. Map the columns with the scraped data by clicking the `+` icon next to each column name. Select the corresponding data for each column from the **Scraping a URL With Autoparse** step.
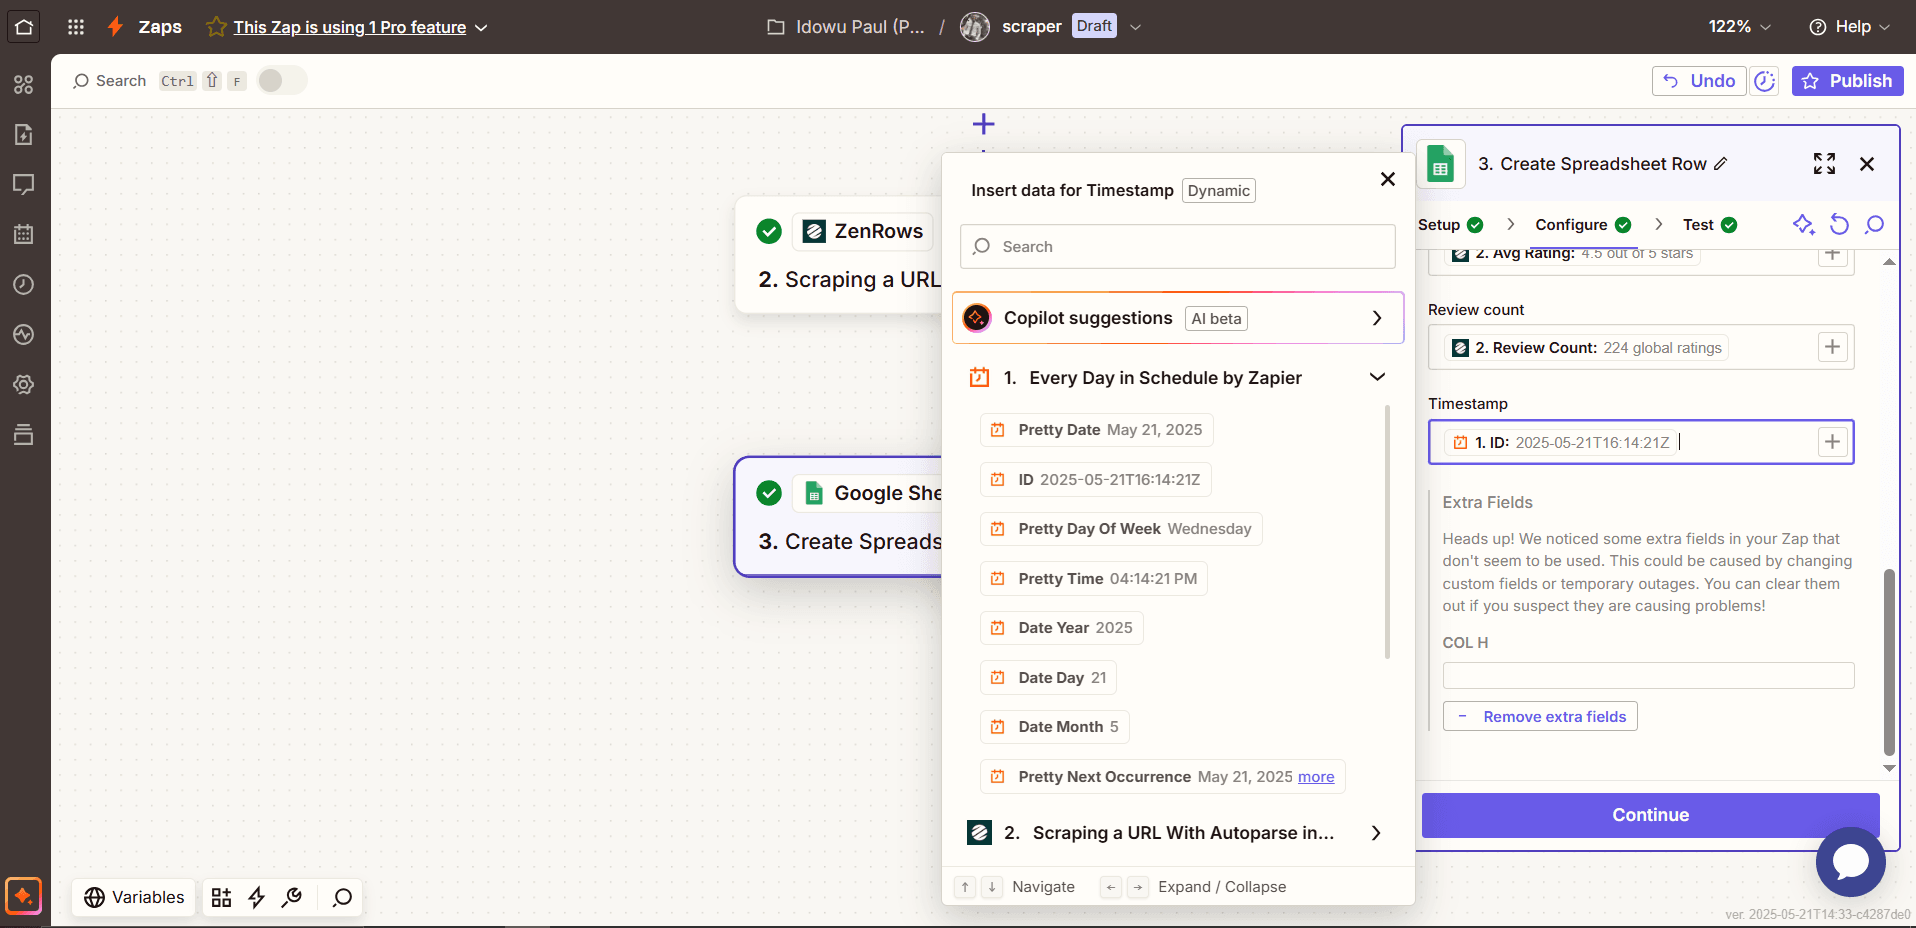
 7. Map the `Timestamp` column with the ID data from the schedule trigger and click `Continue`.
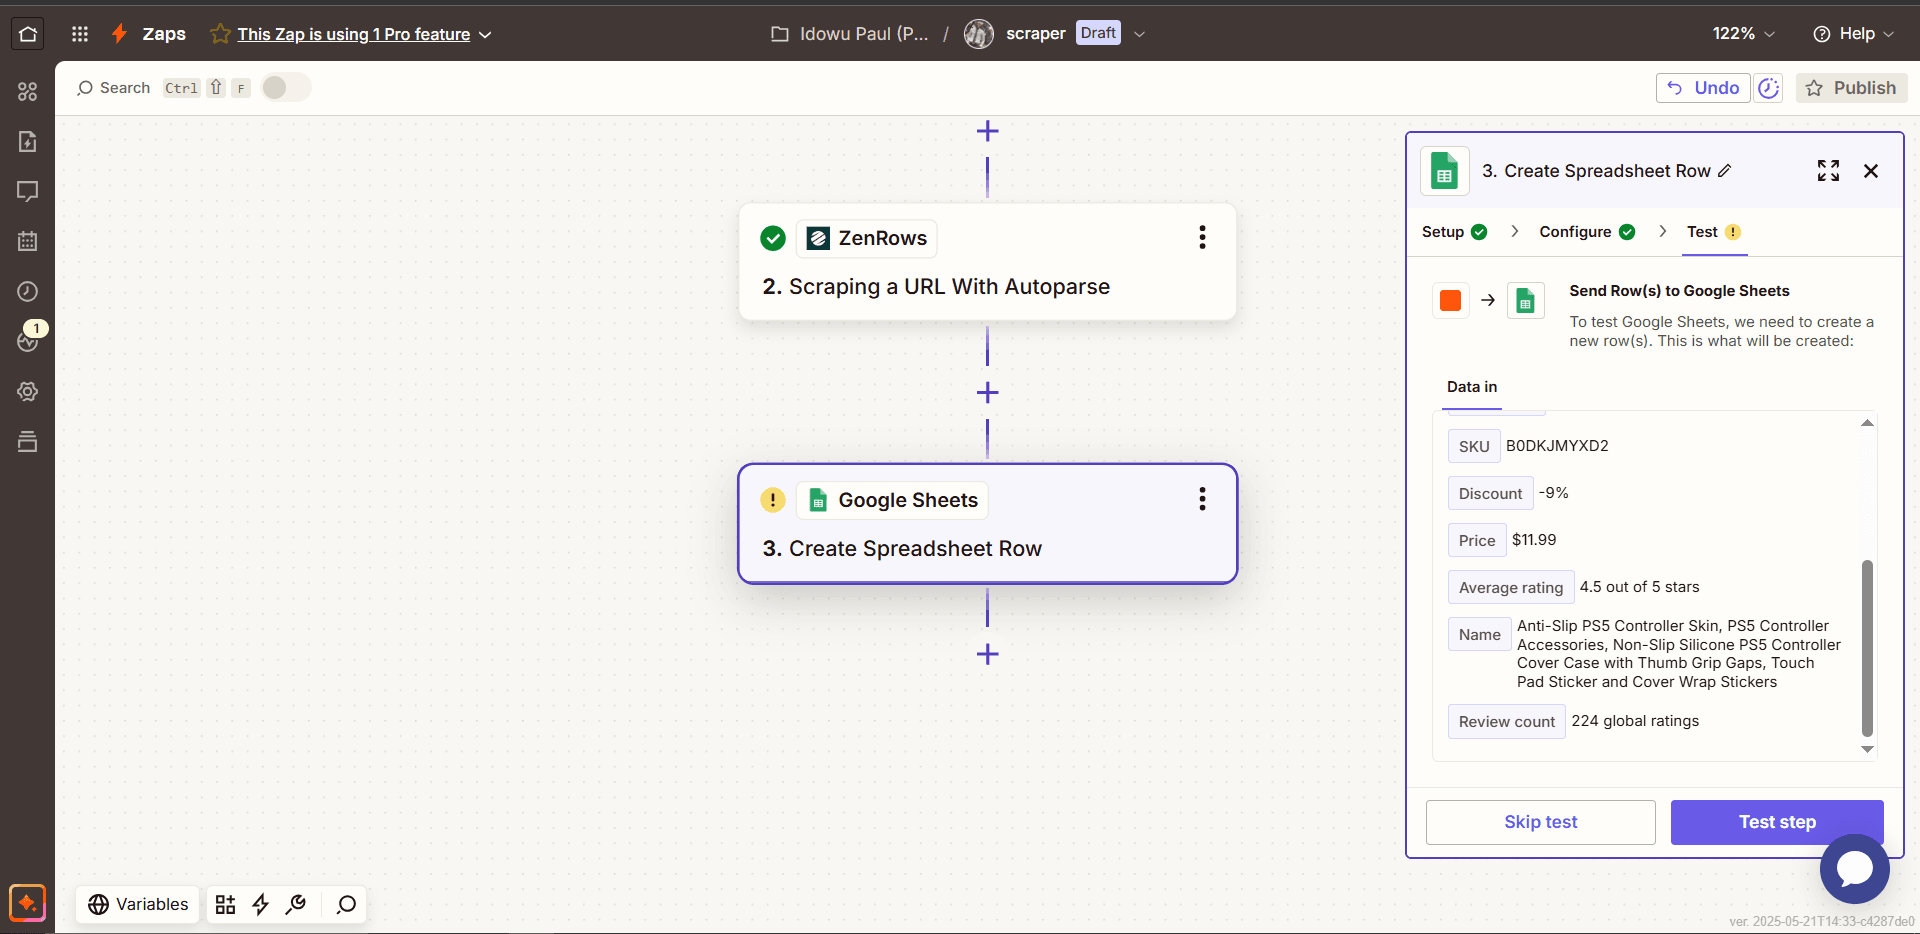
 8. Click `Test step` to confirm the workflow.
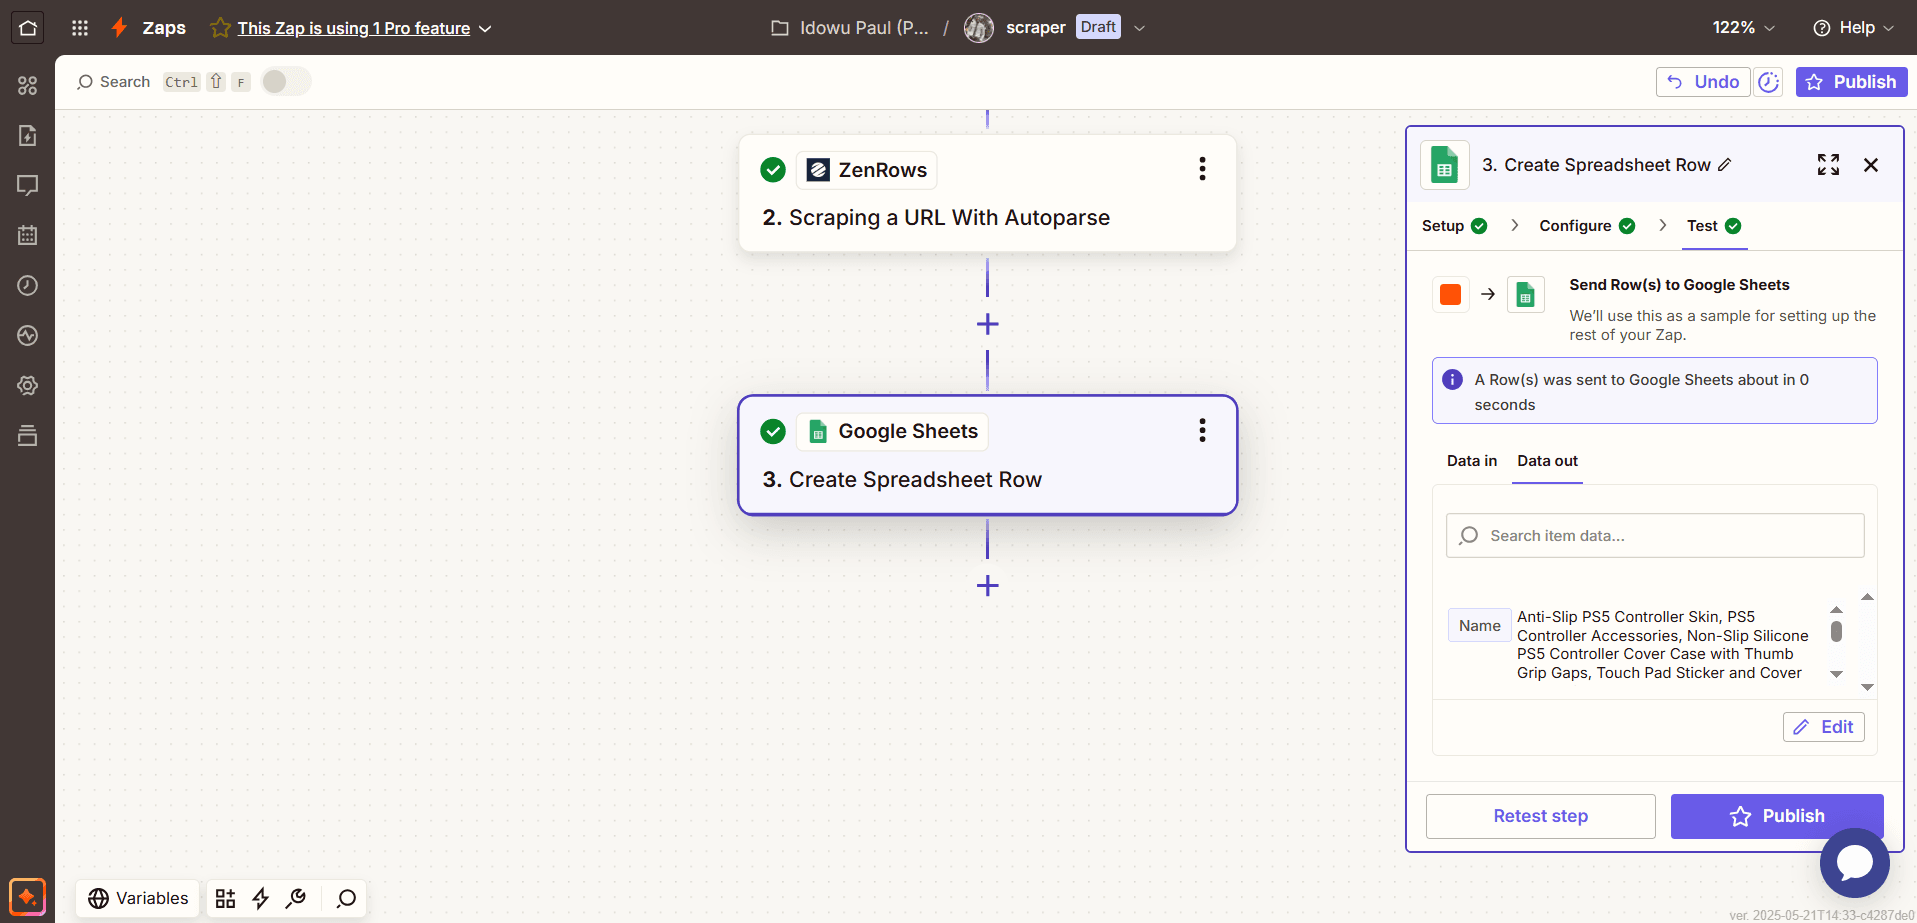
 9. Click `Publish` to activate your scraping schedule.
 ### Step 4: Validate the Workflow
The workflow runs automatically on schedule every day and adds a new row of data to the connected spreadsheet.
### Step 4: Validate the Workflow
The workflow runs automatically on schedule every day and adds a new row of data to the connected spreadsheet.
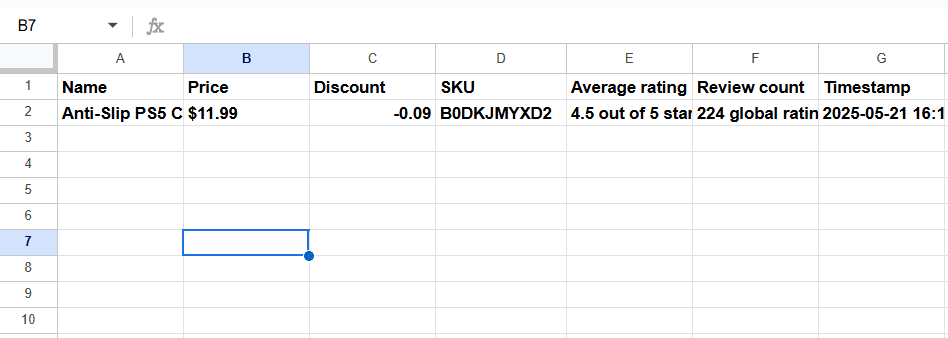 Congratulations! 🎉 You just integrated ZenRows with Zapier and are now automating your scraping workflow.
## ZenRows Configuration Options
ZenRows accepts the following configuration options during Zapier integration:
| **Configuration** | **Function** |
| --------------------------- | ------------------------------------------------------------------------------------------------------------------------------------------------------------------------------------------------------------------------------------------------ |
| **URL** | The URL of the target website. |
| **Premium Proxy** | When activated, it routes requests through the ZenRows Residential Proxies, instead of the default Datacenter proxies. |
| **Proxy Country** | The country geolocation to use in a request. |
| **JavaScript Rendering** | Ensures that dynamic content loads before scraping. |
| **Wait for Selector** | Pauses scraping execution until a particular selector is visible in the DOM. |
| **Wait Milliseconds** | Waits for a fixed amount of time before executing the scraper. |
| **JavaScript Instructions** | Passes JavaScript code to execute actions like clicking, scrolling, and more. |
| **Headers** | Adds the custom headers to the request. |
| **Session ID** | Uses a session ID to maintain the same IP for multiple API requests for up to 10 minutes. |
| **Original Status** | Returns the original status code returned by the target website. |
## Troubleshooting
### Common Issues and Solutions
* **Issue**: Failed to create a URL in ZenRows ('REQS004').
* **Solution**: Double-check the target URL and ensure it's not malformed or missing essential query strings.
* **Solution 2**: If using the CSS selector integration, ensure you pass the selectors as an array (e.g., `[{"title":"#productTitle", "price": ".a-price-whole"}]`).
* **Issue**: Authentication failed (`AUTH002`).
* **Solution**: Double-check your ZenRows API key and ensure you enter a valid one.
* **Issue**: Empty data.
* **Solution**: Ensure ZenRows supports autoparsing for the target website. Check the ZenRows Data Collector Marketplace to view the supported websites.
* **Solution 2**: If using the CSS selector integration, supply the correct CSS selectors that match the data you want to scrape.
***
## Conclusion
You've successfully integrated ZenRows with Zapier and are now automating your scraping workflow, from scheduling to data storage. You can extend your workflow with more applications, including databases like SQL and analytic tools like Tableau.
## Frequently Asked Questions (FAQs)
To authenticate requests, use your ZenRows API key. Replace `ZENROWS API KEY` in the authentication modal that Zapier shows.
{/*
Use the `outputs` parameter to extract structured data like emails, phone numbers, tables, and more.
*/}
Use `wait` to pause the rendering for a specific number of milliseconds. Use `wait_for` with a CSS selector to wait until that element appears before capturing the response. Both require JS Rendering.
ZenRows rotates IPs automatically per request.
Congratulations! 🎉 You just integrated ZenRows with Zapier and are now automating your scraping workflow.
## ZenRows Configuration Options
ZenRows accepts the following configuration options during Zapier integration:
| **Configuration** | **Function** |
| --------------------------- | ------------------------------------------------------------------------------------------------------------------------------------------------------------------------------------------------------------------------------------------------ |
| **URL** | The URL of the target website. |
| **Premium Proxy** | When activated, it routes requests through the ZenRows Residential Proxies, instead of the default Datacenter proxies. |
| **Proxy Country** | The country geolocation to use in a request. |
| **JavaScript Rendering** | Ensures that dynamic content loads before scraping. |
| **Wait for Selector** | Pauses scraping execution until a particular selector is visible in the DOM. |
| **Wait Milliseconds** | Waits for a fixed amount of time before executing the scraper. |
| **JavaScript Instructions** | Passes JavaScript code to execute actions like clicking, scrolling, and more. |
| **Headers** | Adds the custom headers to the request. |
| **Session ID** | Uses a session ID to maintain the same IP for multiple API requests for up to 10 minutes. |
| **Original Status** | Returns the original status code returned by the target website. |
## Troubleshooting
### Common Issues and Solutions
* **Issue**: Failed to create a URL in ZenRows ('REQS004').
* **Solution**: Double-check the target URL and ensure it's not malformed or missing essential query strings.
* **Solution 2**: If using the CSS selector integration, ensure you pass the selectors as an array (e.g., `[{"title":"#productTitle", "price": ".a-price-whole"}]`).
* **Issue**: Authentication failed (`AUTH002`).
* **Solution**: Double-check your ZenRows API key and ensure you enter a valid one.
* **Issue**: Empty data.
* **Solution**: Ensure ZenRows supports autoparsing for the target website. Check the ZenRows Data Collector Marketplace to view the supported websites.
* **Solution 2**: If using the CSS selector integration, supply the correct CSS selectors that match the data you want to scrape.
***
## Conclusion
You've successfully integrated ZenRows with Zapier and are now automating your scraping workflow, from scheduling to data storage. You can extend your workflow with more applications, including databases like SQL and analytic tools like Tableau.
## Frequently Asked Questions (FAQs)
To authenticate requests, use your ZenRows API key. Replace `ZENROWS API KEY` in the authentication modal that Zapier shows.
{/*
Use the `outputs` parameter to extract structured data like emails, phone numbers, tables, and more.
*/}
Use `wait` to pause the rendering for a specific number of milliseconds. Use `wait_for` with a CSS selector to wait until that element appears before capturing the response. Both require JS Rendering.
ZenRows rotates IPs automatically per request.