Can I Log In/Register and Access Content Behind a Login?
Can I Log In/Register and Access Content Behind a Login?
If you need to scrape data from a website that requires login authentication, you can log in or register and access content behind a login. However, due to privacy and legal reasons, we offer limited support for these cases.Login and registration work like regular forms and can be treated as such. There are two main methods to send forms:All requests will return headers, including the session cookies. By using these cookies in subsequent requests, you can operate as a logged-in user. Additionally, you can include a Session ID to maintain the same IP address for up to 10 minutes.
- Send POST requests.
- Fill in and submit a form using JavaScript Instructions.
Can I Maintain Sessions/IPs Between Requests
Can I Maintain Sessions/IPs Between Requests
Suppose you need to perform multiple actions on a website that requires maintaining the same session/IP. You can use the Session ID parameter to maintain the same IP between requests. ZenRows will store the IP for 10 minutes from the first request with that ID. All subsequent requests with that ID will use the same IP.However, session_id will not store any other request data, such as session cookies. You will receive those cookies as usual and can decide which ones to send on the next request.Multiple Session IDs can run concurrently, with no limit to the number of sessions.
Can I Run the API/Proxy in Multiple Threads to Improve Speed?
Can I Run the API/Proxy in Multiple Threads to Improve Speed?
Each plan comes with a concurrency limit. For example, the Developer plan allows 10 concurrent requests, meaning you can have up to 10 requests running simultaneously, significantly improving speed.Sending requests above that limit will result in a 429 Too Many Requests error.We wrote a guide on using concurrency that provides more details, including examples in Python and JavaScript. The same principles apply to other languages and libraries.
Can I Send/Submit Forms?
Can I Send/Submit Forms?
There are different ways to approach submitting forms on a website when you need to retrieve data.POST Requests:
The most straightforward way for non-secured endpoints is to send a POST request as the page does. You can examine and replicate the requests in the browser DevTools.Imitate User Behavior Using JavaScript Instructions:
Use JavaScript Instructions to visit pages protected by anti-bot solutions and interact with them. This includes filling in inputs, clicking buttons, and performing other actions.
CSS Selectors Do Not Work or 'Parser is Not Valid'
CSS Selectors Do Not Work or 'Parser is Not Valid'
Common Issues with CSS Selectors
One of the most common issues users encounter when working with CSS Selectors in web scraping is improper encoding. CSS Selectors need to be correctly encoded to be recognized and processed by the API.You can use ZenRows’ Playground or an online tool to properly encode your CSS Selectors before sending them in a request.Example of Using a CSS Selector
Let’s say you want to extract content from the.my-class CSS selector and store it in a property named test. You would encode the selector and include it in your request like this:Troubleshooting CSS Selector Issues
If you’re still getting empty responses or the parser reports an error:- Check the Raw HTML: Request the plain HTML to see if the content served by the website differs from what you see in your browser. Some websites serve different content based on the user’s location, device, or other factors.
-
Verify the Selector: Ensure the selector you’re using is correct by testing it in your browser’s Developer Tools (e.g., using Chrome’s Console with
document.querySelectorAll(".my-class")). - Review the Documentation: Refer to the ZenRows documentation for detailed information on using CSS Selectors with the API.
See Also
For comprehensive examples of working with complex layouts and advanced selector techniques, check out our Advanced CSS Selector Examples guide.Does session_id Remember Session Data?
Does session_id Remember Session Data?
session_id won’t store any request data, such as session cookies. You will get those back as usual and decide which ones to send on the next request.How do I Export Data to CSV using the Universal Scraper API?
How do I Export Data to CSV using the Universal Scraper API?
Once you’ve extracted data using ZenRows, you might want to store it in CSV format. For simplicity, we’ll focus on a single URL and save the data to one file. In real-world scenarios, you might need to handle multiple URLs and aggregate the results.To start, we’ll explore how to export data to CSV using both Python and JavaScript.You can also adjust the If you encounter any issues or need further assistance with your scraper setup, please contact us, and we’ll be happy to help!
From JSON using Python
If you’ve obtained JSON output from ZenRows with theautoparse feature enabled, you can use Python to convert this data into a CSV file.The Pandas library will help us flatten nested JSON attributes and save the data as a CSV file.Here’s a sample Python script:scraper.py
json_normalize function to control how many nested levels to flatten and rename fields. For instance, to flatten only one inner level and remove latLong from latitude and longitude fields:From HTML using Python
When dealing with HTML output without theautoparse feature, you can use BeautifulSoup to parse the HTML and extract data. We’ll use the example of an eCommerce site from Scraping Course. Create a dictionary for each product with essential details, then use Pandas to convert this list of dictionaries into a DataFrame and save it as a CSV file.Here’s how to do it:scraper.py
From JSON using JavaScript
For JavaScript and Node.js, you can use thejson2csv library to handle the JSON to CSV conversion.After getting the data, we will parse it with a flatten transformer. As the name implies, it will flatten the nested structures inside the JSON. Then, save the file using writeFileSync.Here’s an example using the ZenRows Universal Scraper API with Node.js:scraper.js
From HTML using JavaScript
For extracting data from HTML withoutautoparse you can use the cheerio library to parse the HTML and extract relevant information. We’ll use the Scraping Course eCommerce example for this task:As with the Python example, we will use AutoScout24 to extract data from HTML without the autoparse feature. For that, we will get the plain result and load it into cheerio. It will allow us to query elements as we would in the browser or with jQuery. We will return an object with essential data for each car entry in the list. Parse that list into CSV using json2csv, and no flatten is needed this time. And lastly, store the result. These last two steps are similar to the autoparse case.scraper.js
Extract Data from Lists, Tables, and Grids
Extract Data from Lists, Tables, and Grids
We’ll explore popular use cases for scraping, such as lists, tables, and product grids. Use these as inspiration and a guide for your scrapers.Our Playground can help you write and test the selectors and output code in several languages.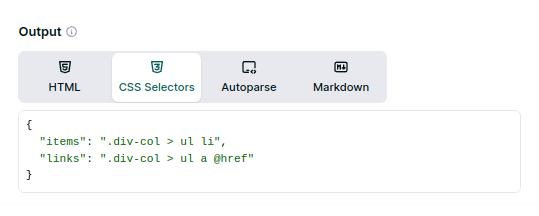 Outputs:As stated above, this might prove difficult for non-regular tables. For those, we might prefer to get the Plain HTML and scrape the content with a tool or library so we can add conditionals and logic.This example lists items by column, not row, which might prove helpful in various cases. However, there are no easy ways to extract structured data from tables using CSS Selectors and group it by row.Several items are on the page at the time of this writing. And each array has the same number of elements, so everything looks fine. If we were to group them, we could zip the arrays.For example, in python, taking advantage of the auto-encoding that Remember that this approach won’t work properly if, for example, some products have no price. Not all the arrays would have the same length, and the zipping would misassign data. Getting the Plain HTML and parsing the content with a library and custom logic is a better solution for those cases.If you encounter any problems or cannot correctly set up your scraper, contact us, and we’ll help you.
Scraping from Lists
We will use the Wikipedia page on Web scraping for testing. A section at the bottom, “See also”, contains links in a list. We can get the content by using the CSS selector for the list items:{"items": ".div-col > ul li"}.That will get the text, but what of the links? To access attributes, we need a non-standard syntax for the selector: @href. It won’t work with the previous selector since the last item is the li element, which does not have an href attribute. So we must change it for the link element: {"links": ".div-col > ul a @href"}.CSS selectors, in some languages, must be encoded to avoid problems with URLs.Scraping from Tables
Assuming regular tables (no empty cells, rows with fewer items, and others), we can extract table data with CSS selectors. We’ll use a list of countries, the first table on the page, the one with the classwikitable.To extract the rank, which is the first column, we can use "table.wikitable tr > :first-child". It will return an array with 243 items, 2 header lines, and 241 ranks. For the country name, second column, something similar but adding an a to avoid capturing the flags: "table.wikitable tr > :nth-child(2) a". In this case, the array will have one less item since the second heading has no link. That might be a problem if we want to match items by array index.Scraping from Product Grids
As with the tables, non-regular grids might cause problems. We’ll scrape the price, product name, and link from an online store. By manually searching the page’s content, we arrive at cards with the class.product. Those contain all the data we want.It is essential to avoid duplicates, so we have to use some precise selectors. For example, ".product-item .product-link @href" for the links. We added the .product-link class because it is unique to the product cards. The same goes for name and price, which also have unique classes.
All in all, the final selector would be:requests.get does to parameters. Remember to encode the URL and CSS extractor for different scenarios when that is not available.scraper.py
How Can I Set Specific Headers?
How Can I Set Specific Headers?
ZenRows allows you to send Custom Headers on requests in case you need to scrape a website that requires specific headers.However, it’s important to test the success rate when changing them. ZenRows® automatically manages certain headers, especially those related to the browser environment, such as User-Agent.Defensive systems inspect headers as a whole, and not all browsers use the same ones. If you choose to send custom headers, ensure the rest of the headers match accordingly.
How Do I Send POST Requests with JSON Data?
How Do I Send POST Requests with JSON Data?
By default, POST requests use
application/x-www-form-urlencoded. To send JSON data, you need to add the Content-Type: application/json header manually, though some software/tools may do this automatically.Before trying on your target site, we recommend using a testing site like httpbin.io to verify that the parameters are sent correctly.Ensure that the parameters are sent and the format is correct. If in doubt, switch between both modes to confirm that the changes are applied correctly.For more info on POST requests, see How do I send POST requests?.How do I Send POST Requests?
How do I Send POST Requests?
Send POST requests using your chosen programming language. ZenRows will transparently forward the data to the target site.Before trying on your target site, we recommend using a testing site like httpbin.io to verify that the parameters are sent correctly.Testing is important because not all languages and tools handle POST requests the same way. Ensure that the parameters and format are correct. By default, browsers send content as
application/x-www-form-urlencoded, but many sites expect JSON content, requiring the Content-Type: application/json header.How to encode URLs?
How to encode URLs?
When working with the ZenRows Universal Scraper API, it’s crucial to encode your target URLs, especially if they contain query parameters. Encoding ensures that your URLs are correctly interpreted by the API, avoiding potential conflicts between the target URL’s parameters and those used in the API request.Consider the following URL example:In this scenario, the API might incorrectly interpret the After encoding, your Universal Scraper API request would look like this:Many HTTP clients, such as
https://www.scrapingcourse.com/ecommerce/?course=web-scraping§ion=advancedIf you were to send this URL directly as part of your API request without encoding, and you also include the premium_proxy parameter, the request might look something like this:course and section parameters as part of the API’s query string rather than the target URL. This could lead to errors or unintended behavior.To avoid such issues, you should encode your target URL before including it in the API request. URL encoding replaces special characters (like &, ?, and =) with a format that can be safely transmitted over the internet.Here’s how you can encode the URL in Python:encoder.py
axios (JavaScript) and requests (Python), automatically encode URLs for you. However, if you are manually constructing requests or using a client that doesn’t handle encoding, you can use programming language functions or online tools to encode your URLs.For quick manual encoding, you can use an online tool, but remember that this method is not scalable for automated processes.What are Residential IPs?
What are Residential IPs?
Understanding Proxy Types: Data Center vs. Residential IPs
When it comes to web scraping proxies, there are two main types of IPs you can use: data center and residential.- Data Center IPs: These are IP addresses provided by cloud service providers or hosting companies. They are typically fast and reliable, but because they are easily recognizable as belonging to data centers, they are more likely to be blocked by websites that have anti-scraping measures in place.
- Residential IPs: These IP addresses are assigned by Internet Service Providers (ISPs) to real residential users. Since they appear as regular users browsing the web, they are much harder to detect and block. This makes residential IPs particularly valuable when scraping sites with strong anti-bot protections, like Google or other heavily guarded domains.
How ZenRows Uses Residential IPs
By default, ZenRows uses data center connections for your requests. However, if you’re facing blocks or need to scrape highly protected websites, you can opt for residential IPs by setting thepremium_proxy parameter to true. This will route your request through a residential IP, significantly increasing your chances of success.It’s important to note that using residential IPs comes with an additional cost due to the higher value and lower detection rate of these proxies.Example of a Request with Residential IPs
Here’s how you can make a request using a residential IP:Troubleshooting Blocks
If you continue to experience blocks even with residential IPs, feel free to contact us, and we’ll work with you to find a solution.What is Autoparse?
What is Autoparse?
Simplifying Data Extraction with Autoparse
ZenRows offers a powerful feature called Autoparse, designed to simplify the process of extracting structured data from websites. This feature leverages custom parsers allowing you to easily retrieve data in a structured JSON format rather than raw HTML.How It Works
By default, when you call the ZenRows API, the response will be in Plain HTML. However, when you activate theautoparse parameter, the API will automatically parse the content of supported websites and return the data as a JSON object. This makes it much easier to work with the data, especially when dealing with complex websites that require extensive parsing logic.Example of a Request with Autoparse
Here’s how you can make an API call with the Autoparse feature enabled:Limitations and Troubleshooting
- Supported Domains: The Autoparse feature is in experimental phase and doesn’t work in all domains. You can view some of the supported domains on the ZenRows Scraper page. If the website you’re trying to scrape isn’t supported, the response will either be empty, incomplete, or an error.
-
Fallback to HTML: If you find that Autoparse doesn’t return the desired results, you can simply remove the
autoparseparameter and try the request again. This will return the plain HTML response, allowing you to manually parse the data as needed.
What Are the Benefits of JavaScript Rendering?
What Are the Benefits of JavaScript Rendering?
Enabling JavaScript Rendering not only allows you to scrape content that would otherwise be inaccessible, but it also unlocks advanced scraping features. For example, with JavaScript Rendering, you can use the
wait_for parameter to delay scraping until a specific element is present on the page, ensuring you capture the content you need.Why Some Headers are Managed by ZenRows?
Why Some Headers are Managed by ZenRows?
Browser-based headers are crucial for ensuring that requests appear legitimate to target websites. ZenRows manages these headers to mimic real user behavior, which significantly reduces the risk of being blocked. By preventing customers from manually setting these headers, ZenRows can optimize the success rate and avoid common pitfalls associated with improper header configurations.
Example of Sending Custom Headers
Here’s an example usingcURL to send custom headers that are permitted along with your ZenRows request:bash