What Is Undici?
Undici is a fast, reliable HTTP/1.1 client written from scratch for Node.js. It provides significant performance improvements over traditional HTTP clients, such as Axios and node-fetch, making it ideal for high-throughput scraping applications. Undici supports advanced features like HTTP/1.1 pipelining, connection pooling, and multiple request methods.Key Benefits of Integrating Undici with ZenRows
The undici-zenrows integration brings the following advantages:- Superior Performance: Undici delivers up to 3x better performance compared to traditional HTTP clients, making your scraping operations faster and more efficient.
- Advanced Connection Management: Built-in connection pooling and HTTP/1.1 pipelining capabilities optimize resource usage for high-volume scraping.
- Enterprise-Grade Scraping Reliability: Combine Undici’s robust HTTP handling with ZenRows’ scraping infrastructure.
- Multiple Request Methods: Choose from
request,fetch,stream, orpipelineAPI methods based on your specific use case requirements. - Memory Efficient: Stream-based processing reduces memory overhead for large-scale scraping operations.
- TypeScript Support: Full TypeScript support for a better development experience and type safety.
Getting Started: Basic Usage
Let’s start with a simple example that uses Undici to scrape the Antibot Challenge page through ZenRows’ Universal Scraper API.Step 1: Install Undici
Install theundici package using npm:
Step 2: Set Up Your Project
You’ll need your ZenRows API key, which you can get from the Request builder dashboard.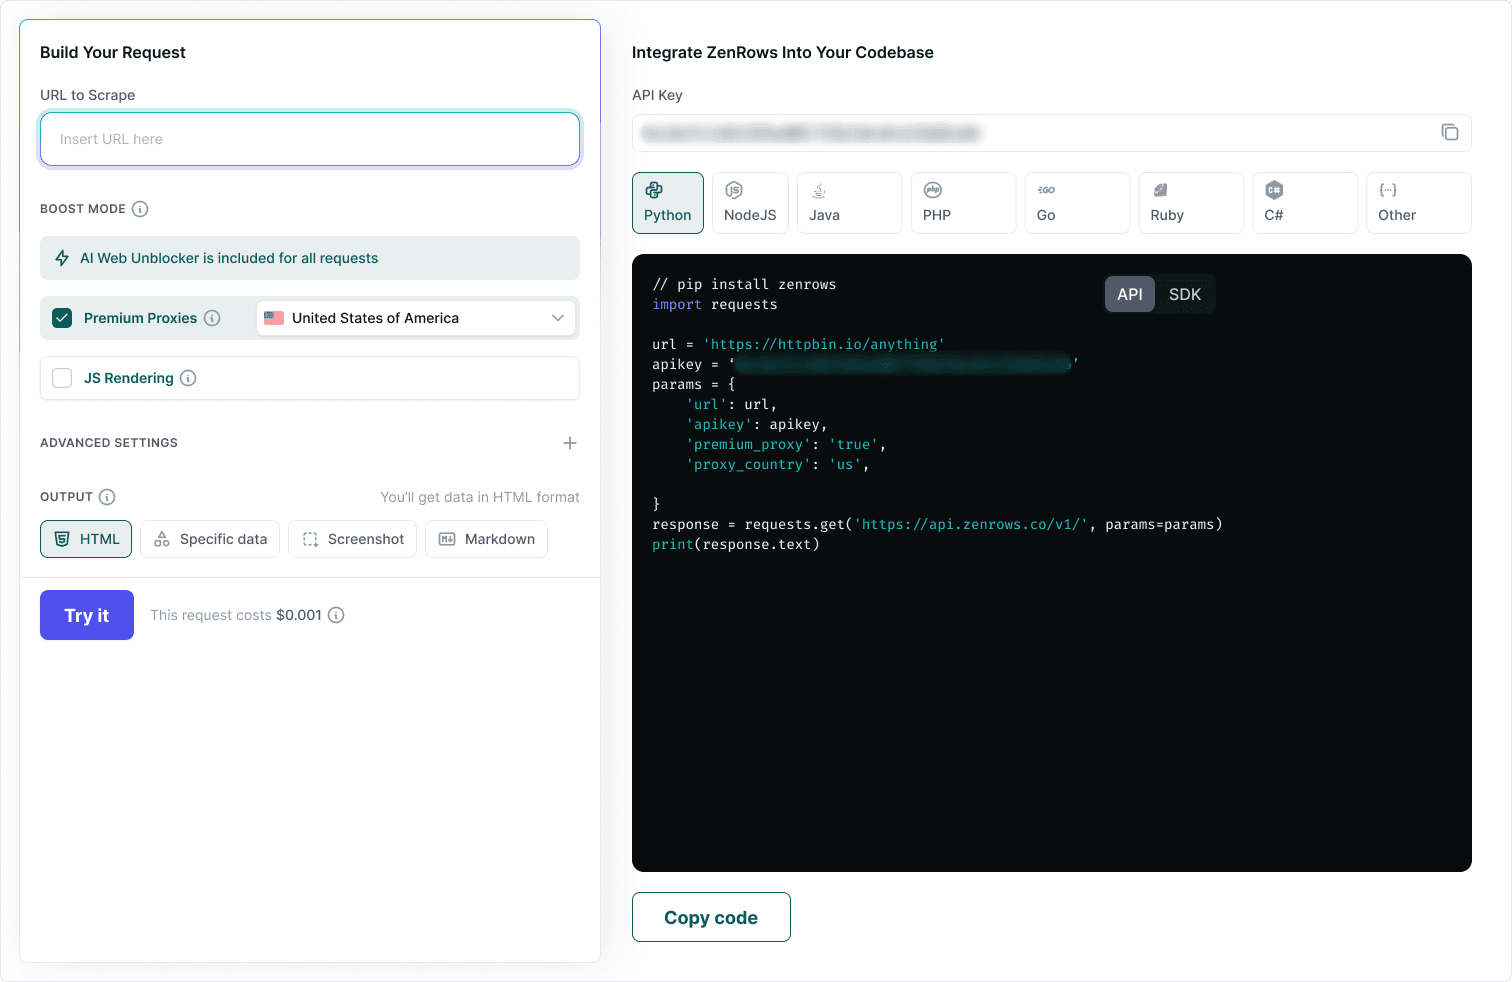
You can explore different parameter configurations using the Request Playground dashboard, then apply those settings in your Undici implementation. For a complete list of available parameters and their descriptions, refer to the API Reference documentation.
Node.js
Step 3: Make Your First Request
Use Undici’srequest method to call ZenRows’ Universal Scraper API:
Node.js
YOUR_ZENROWS_API_KEY with your actual API key and run the script:
Output
Complete Example: E-commerce Product Scraper
Now let’s build a complete scraper for an e-commerce site to demonstrate practical use cases with Undici and ZenRows.Step 1: Scrape the E-commerce Site
Let’s start by scraping an e-commerce demo site to see how Undici handles real-world scenarios. We’ll extract the complete HTML content of the page:Node.js
Output
Step 2: Parse the Scraped Data
Now that you can successfully scrape the site, let’s extract specific product information using CSS selectors. We’ll use ZenRows’css_extractor parameter to get structured data:
Node.js
Output
Step 3: Export Data to CSV
Finally, save the scraped product data to a CSV file for further analysis:Node.js
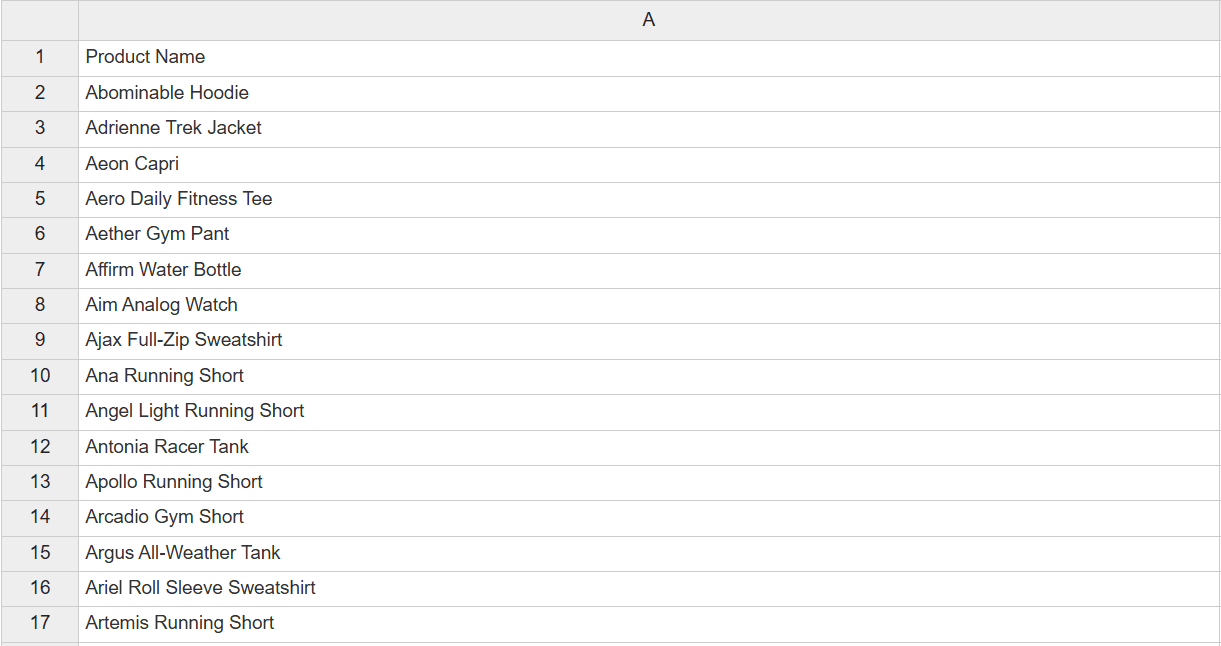 Congratulations! You now have a complete working scraper that can extract product data from an e-commerce site and export it to a CSV file.
Next Steps
You now have a complete foundation for high-performance web scraping with Undici and ZenRows. Here are some recommended next steps to optimize your scraping operations:- Undici Documentation: Explore Undici’s advanced features like HTTP/1.1 pipelining, custom dispatchers, and performance optimizations.
- Complete API Reference: Explore all available ZenRows parameters and advanced configuration options to customize your Undici requests for specific use cases.
- JavaScript Instructions Guide: Learn how to perform complex page interactions like form submissions, infinite scrolling, and multi-step workflows using ZenRows’ browser automation.
- Output Formats and Data Extraction: Master advanced data extraction with CSS selectors, convert responses to Markdown or PDF, and capture screenshots using Undici’s streaming capabilities.
Getting Help
Request failures can happen for various reasons when using Undici with ZenRows. For detailed troubleshooting guidance, visit our comprehensive troubleshooting guide and check Undici’s documentation for HTTP client-specific issues. If you’re still facing issues despite following the troubleshooting tips, our support team is available to help you. Use the chatbox in the Request Playground dashboard or contact us via email to get personalized help from ZenRows experts. When contacting support, always include theX-Request-Id from your response headers to help us diagnose issues quickly.
Frequently Asked Questions (FAQ)
How do I handle websites that block my Undici requests?
How do I handle websites that block my Undici requests?
Enable both
js_render and premium_proxy parameters in your ZenRows API calls. This combination offers the highest success rate against sophisticated antibot protection by simulating real browser behavior and utilizing high-quality residential IP addresses.How do I handle JavaScript-heavy websites with Undici and ZenRows?
How do I handle JavaScript-heavy websites with Undici and ZenRows?
Enable the
js_render parameter in your ZenRows API calls. This uses a real browser to execute JavaScript and capture the fully rendered page. Combine with Undici’s efficient request handling for optimal performance on modern web applications.Can I use Undici's streaming capabilities with ZenRows?
Can I use Undici's streaming capabilities with ZenRows?
Absolutely! Undici’s
stream() and pipeline() methods work perfectly with ZenRows. This is especially useful for processing large responses efficiently without loading everything into memory.What's the difference between undici.request() and undici.fetch() with ZenRows?
What's the difference between undici.request() and undici.fetch() with ZenRows?
undici.request() provides better performance and more control over the request/response lifecycle, while undici.fetch() offers a more familiar API similar to browser fetch. For maximum performance with ZenRows, use undici.request().How do I extract specific data from pages using Undici and ZenRows?
How do I extract specific data from pages using Undici and ZenRows?
Use the
css_extractor parameter in your ZenRows API calls to extract content using CSS selectors directly. The response will be JSON instead of HTML, making it easier to process with Undici.Can I use Undici with ZenRows for real-time monitoring?
Can I use Undici with ZenRows for real-time monitoring?
Yes! Undici’s performance characteristics make it excellent for real-time monitoring. Use session management with ZenRows’
session_id parameter and implement efficient polling with Undici’s connection pooling.Does Undici work with ZenRows' advanced features like screenshots and PDF outputs?
Does Undici work with ZenRows' advanced features like screenshots and PDF outputs?
Yes! All ZenRows features work with Undici.