What Is Node-RED?
Node-RED is a low-code programming tool that connects different services and APIs using a visual, drag-and-drop interface. It includes built-in workflow nodes for automating repetitive tasks, including action triggers, scheduling, data storage, and more.Use Cases
• Price comparison: Use Node-RED’s schedule node to run a periodic price scraping operation on competitors’ sites using ZenRows. Connect your flow to an LLM node to analyze price disparities. • Property analysis: Use ZenRows to scrape property listing pages across popular real-estate sites and use Node-RED workflow to automate continuous data extraction, cleaning, storage, and analysis. • Web page monitoring: Periodically monitor a web page by combining Node-RED’s scheduler with ZenRows’ scraping capabilities. • Sentiment analysis: Use a ZenRows scraping node to collect data from various platforms, including social media, review sites, Google review pages, and more. Pass the scraped data to an LLM node for sentiment extraction. • Lead generation: Use Node-RED’s automation features to automate quality lead scraping using ZenRows’ unique scraping capabilities.Integration Steps
In this guide, we’ll create a scheduled Node-RED workflow that extracts product data from an Amazon product page using ZenRows’css_extractor.
Step 1: Install and Launch Node-RED
-
Install the node-red package globally:
-
Launch the Node-RED server:
This command starts Node-RED on
http://localhost:1880. -
Visit the localhost URL via your browser to load Node-RED’s platform as shown
Step 2: Get the request URL from ZenRows
- Open the ZenRows Universal Scraper API Playground.
- Paste the target URL in the link box, activate JS Rendering and Premium Proxies.
- Under Output, click Specific data and select Parsers.
- Enter the CSS selector array in the Parsers field. We’ll use the following CSS extractors in this guide:
JSON
- Select cURL as your language. Then, copy the URL generated after the cURL command.
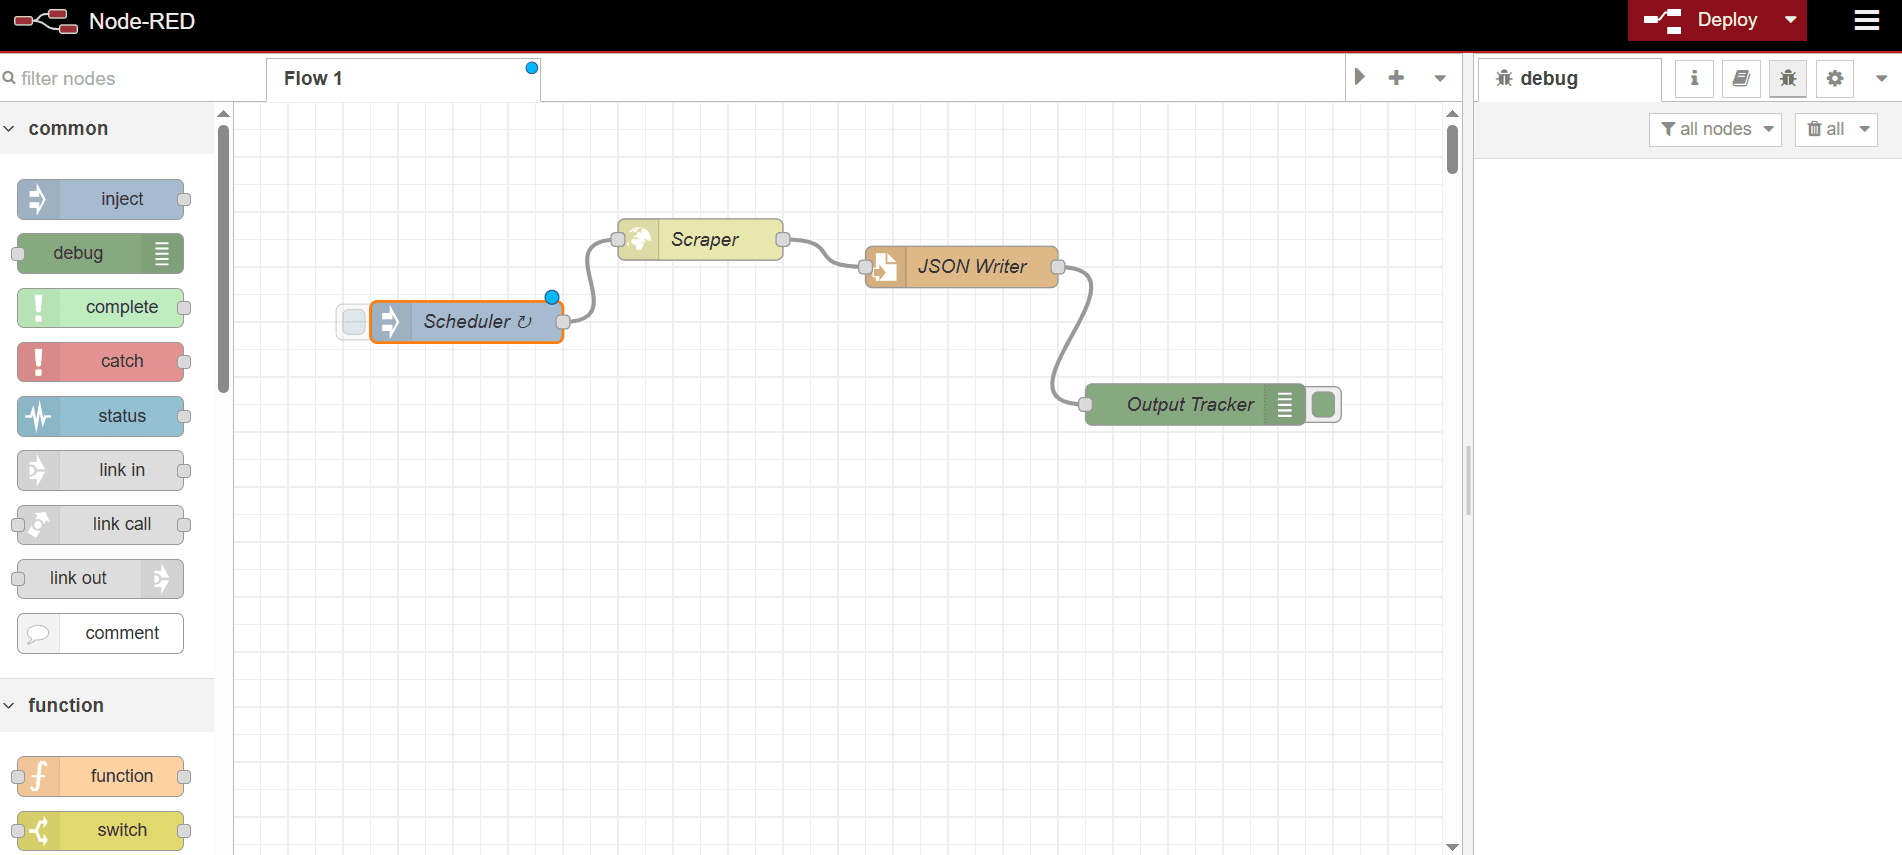
Step 3: Create your scraping workflow
-
Drag the Inject Node into the canvas.
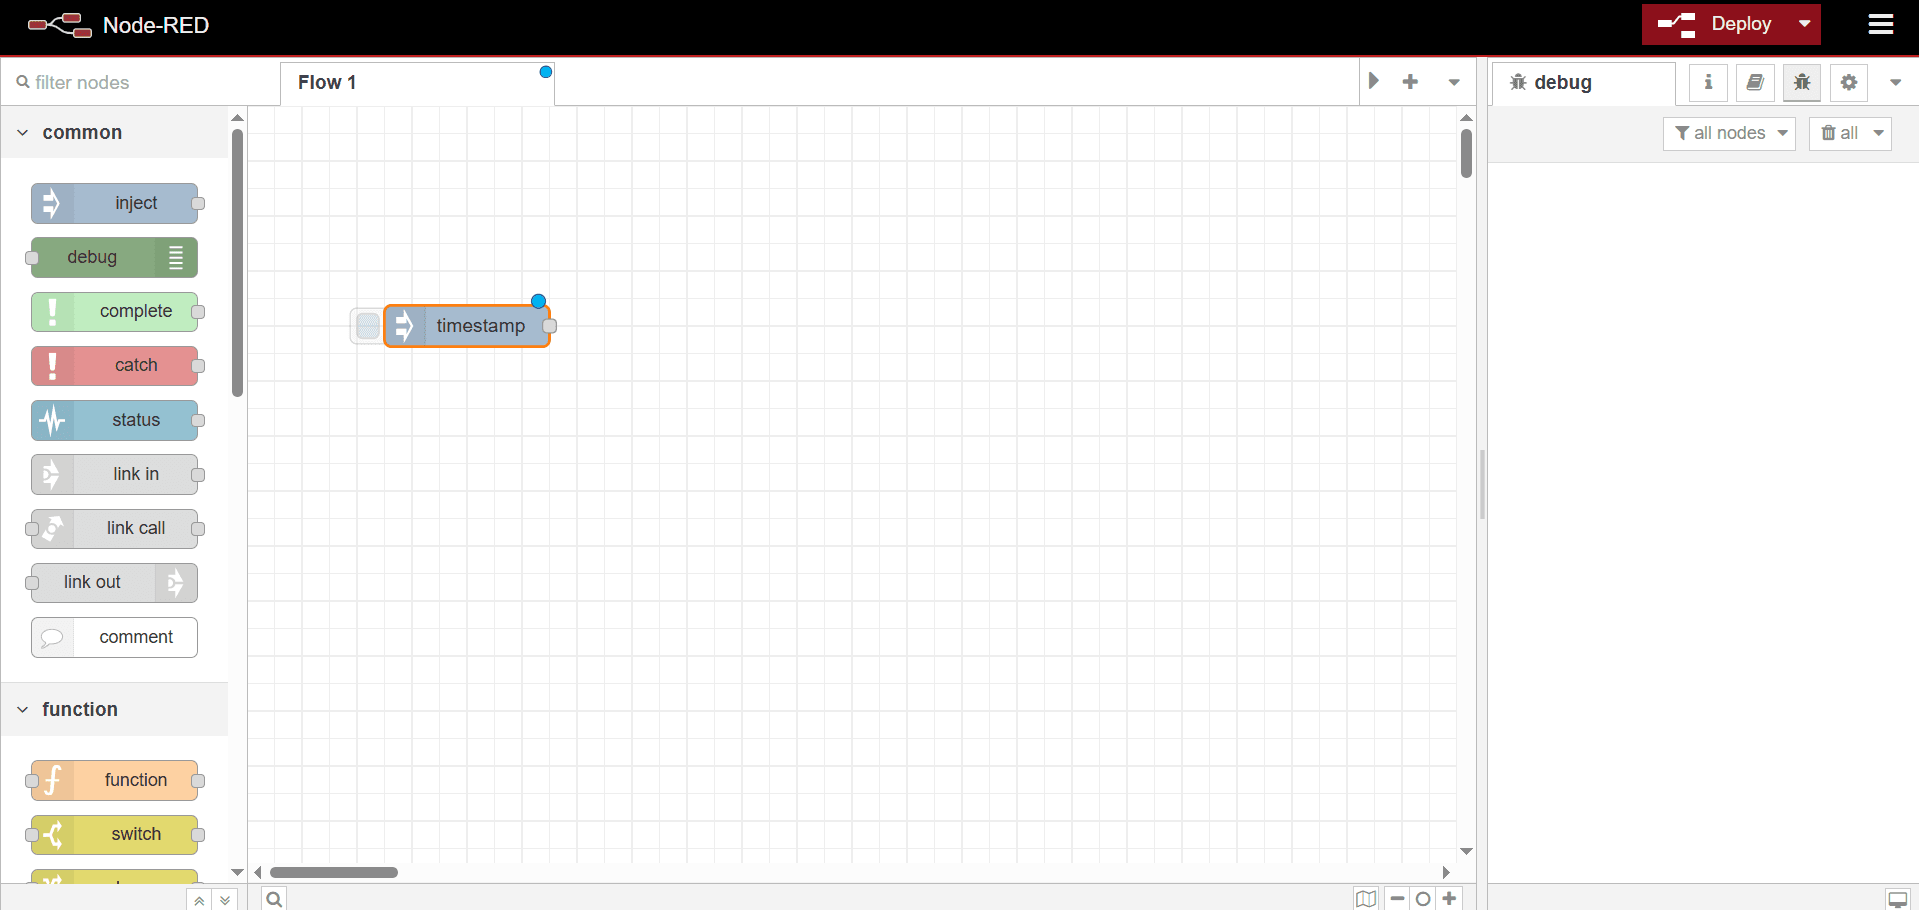
-
Double-click the
timestampnode and enter a name in the Name field to rename it (e.g., “Scheduler”). - Click the Repeat dropdown and select a schedule. We’ll use a 10-second Interval in this guide.
-
Click
Done.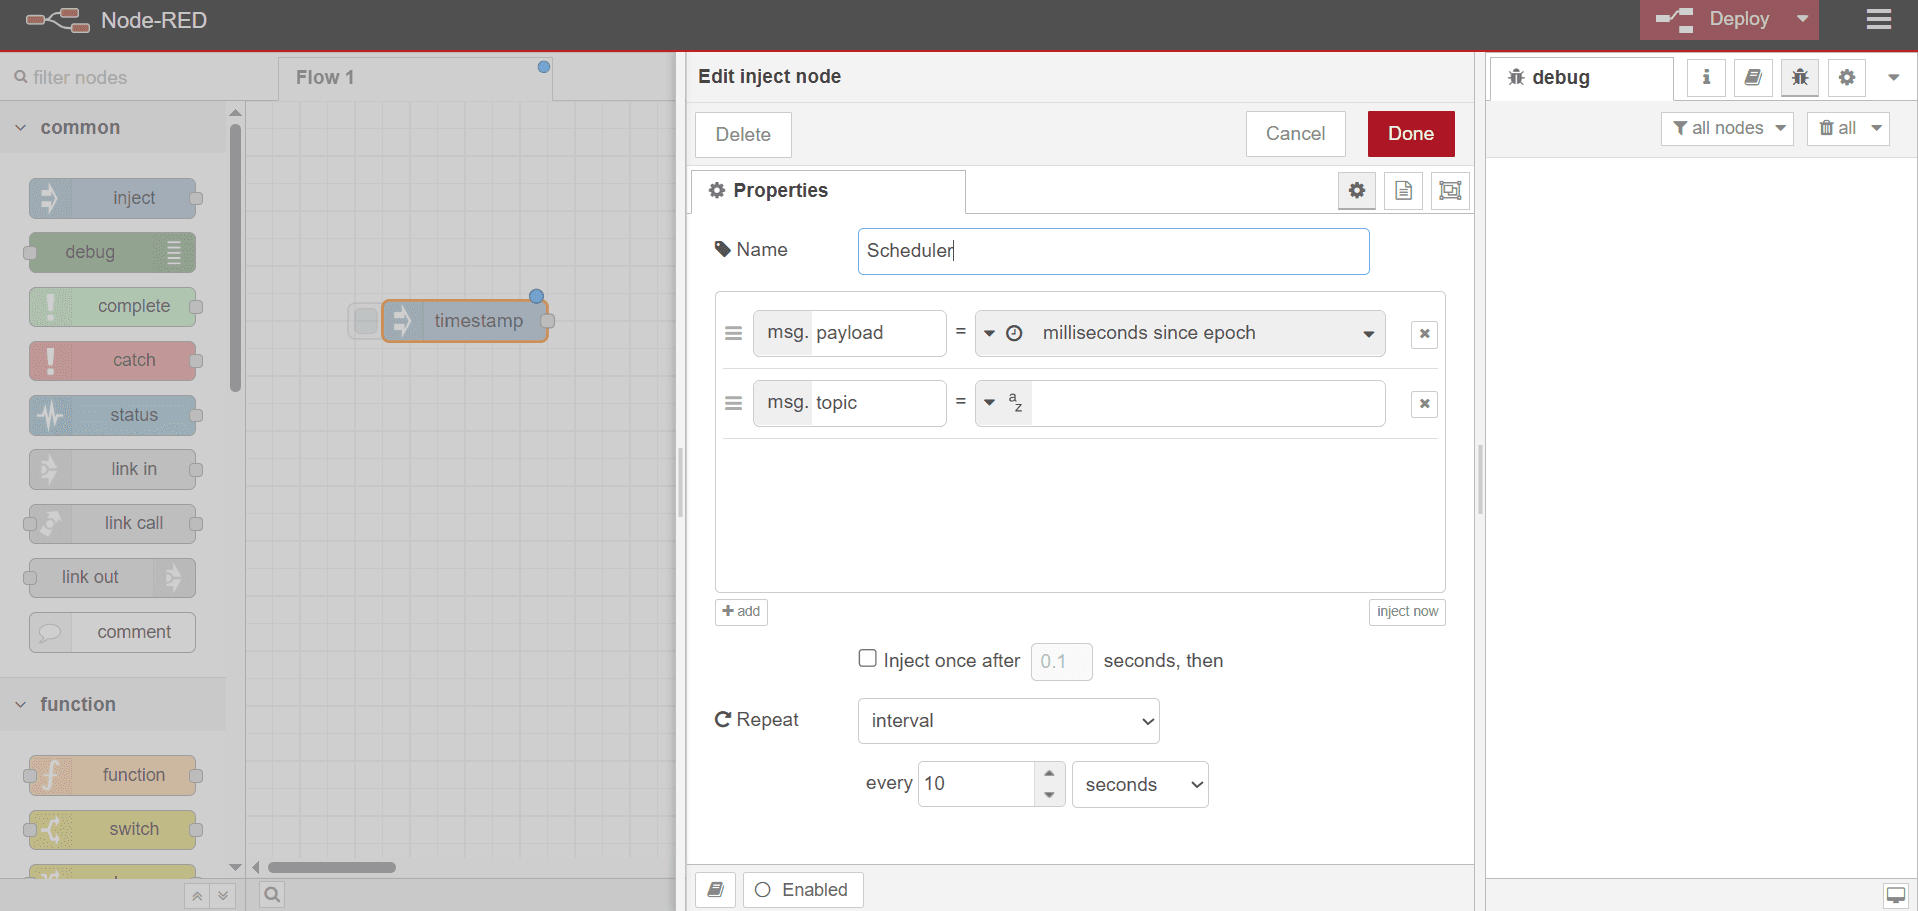
- From the search bar at the top left, search for http request. Then, drag the http request node into the canvas.
-
Link both nodes by dragging a line to connect them at either end.
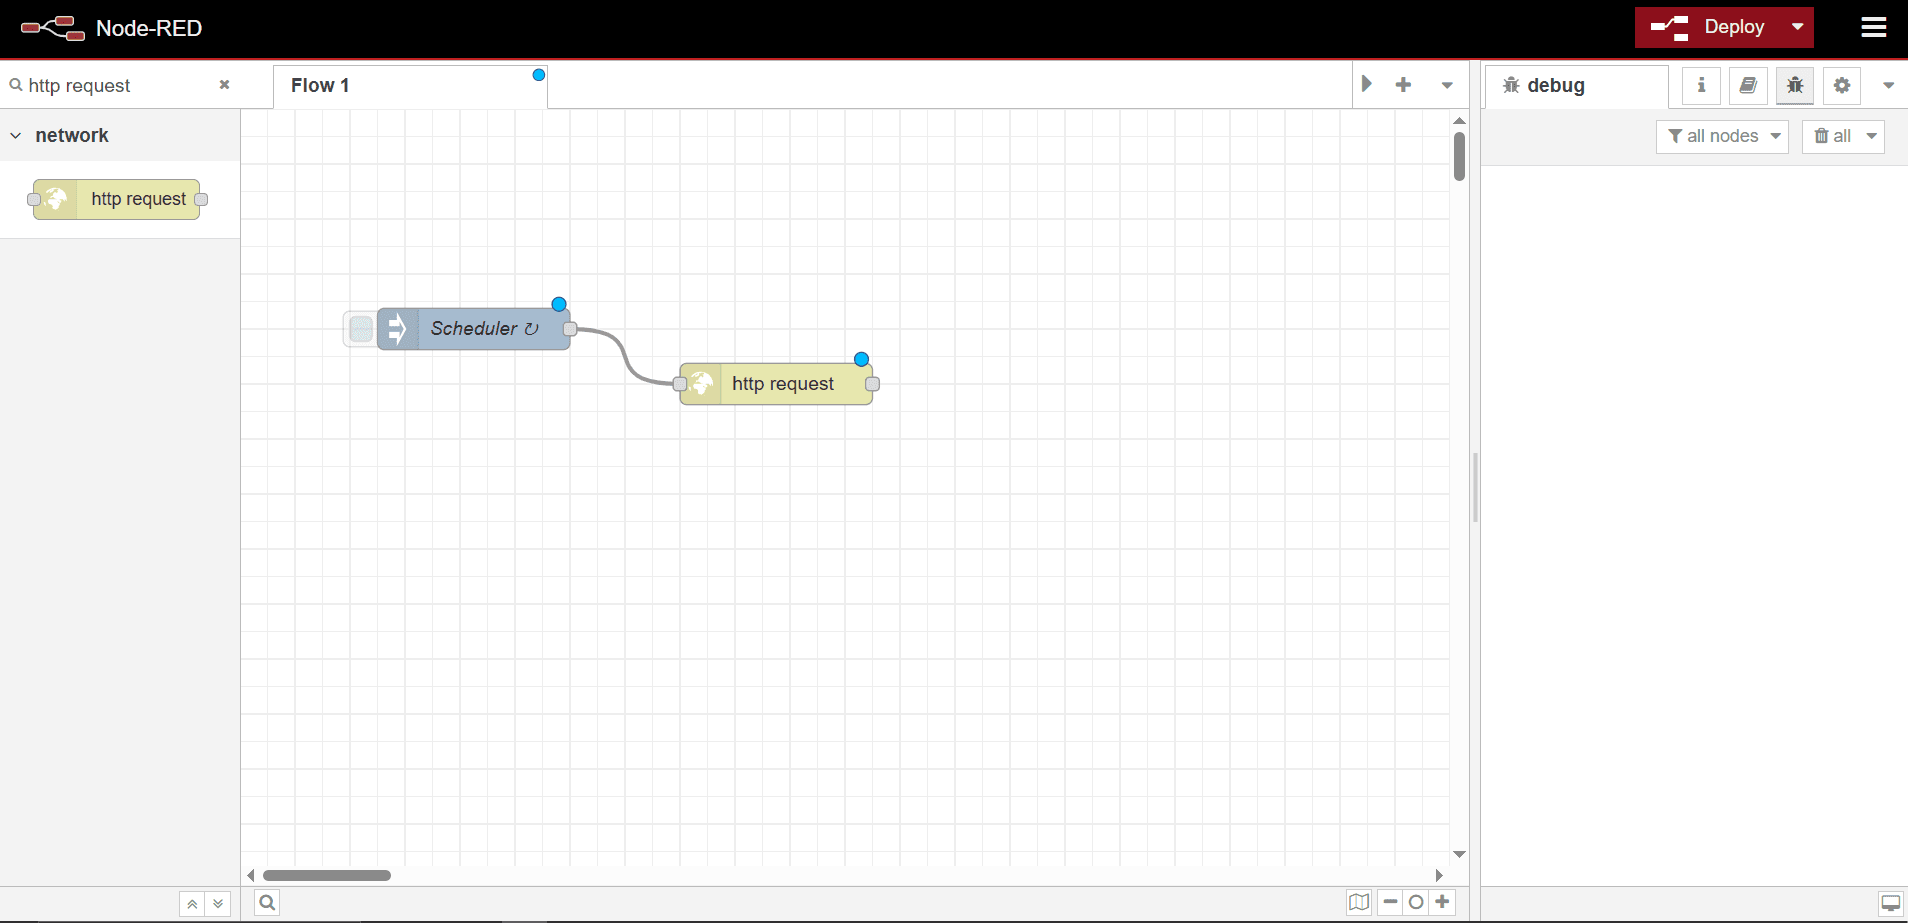
- Double-click the http request node.
- Paste the ZenRows connection URL you copied previously in the URL field.
- Change the Return field to a Parsed JSON object to parse the returned string as a JSON object.
- Enter a name for your HTTP node in the Name field (e.g., Scraper).
-
Click
Done.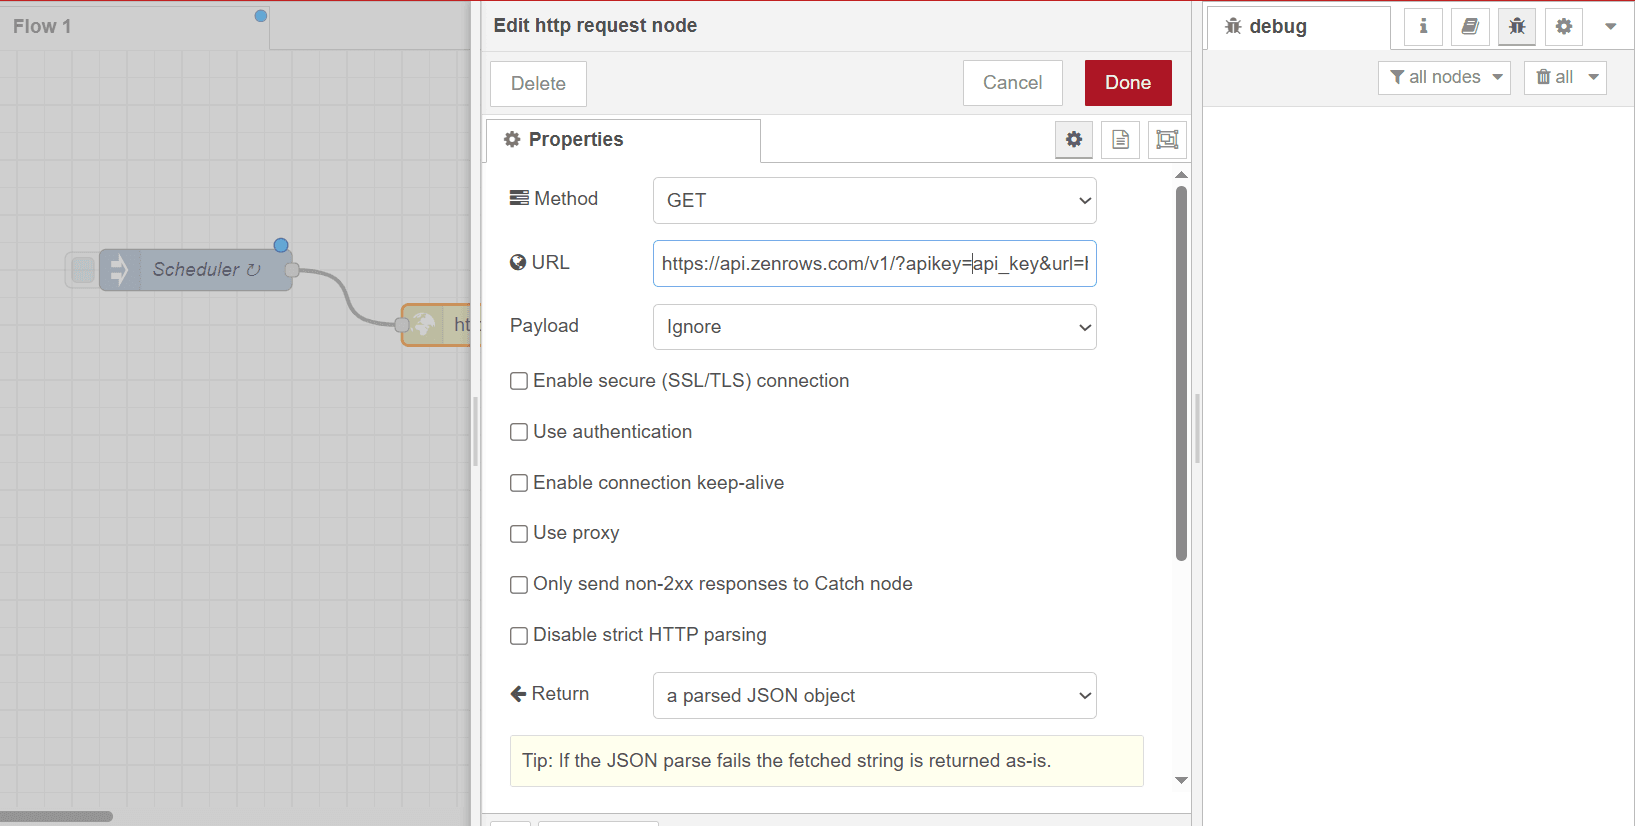
Step 4: Add storage and output nodes
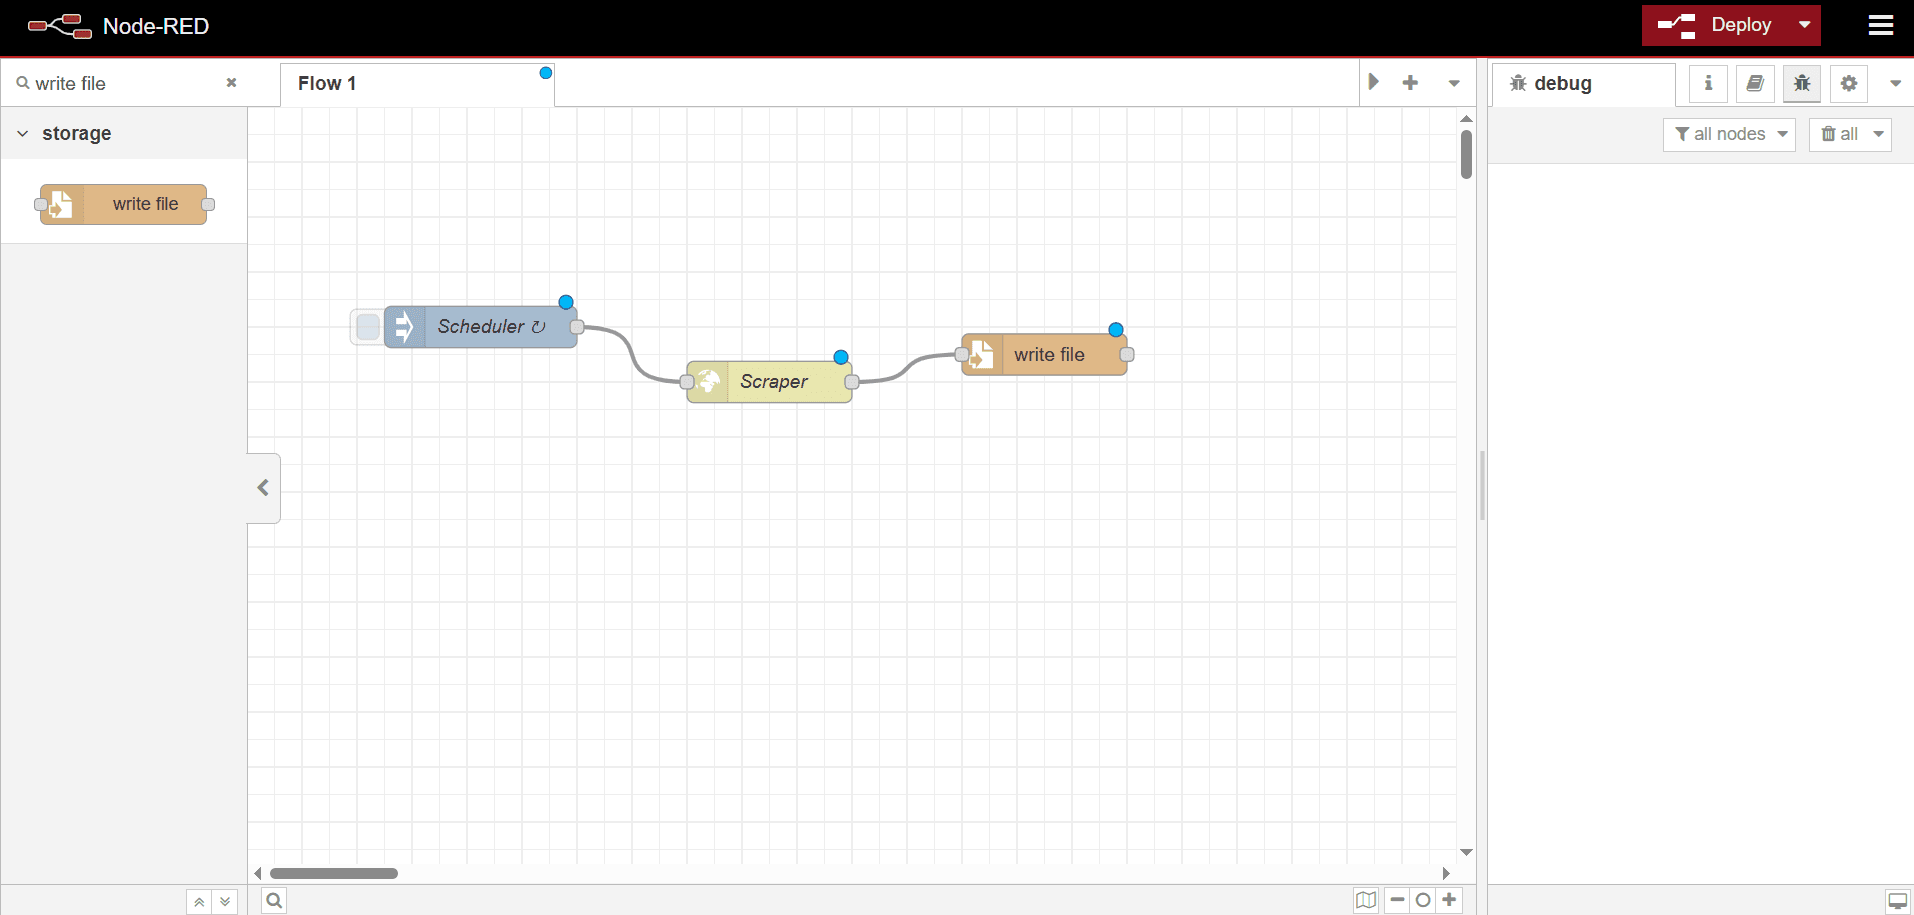
- Search for write file in the search bar and drag the write file node into the canvas.
-
Link the write file node with the Scraper node.
- Double-click the write file node to configure it.
- In the Filename field, enter the JSON file path.
- Under Action, select a suitable action. We’ll choose the overwrite file option in this guide.
- Enter a name in the Name field to rename the node (e.g., JSON Writer).
-
Click
Done.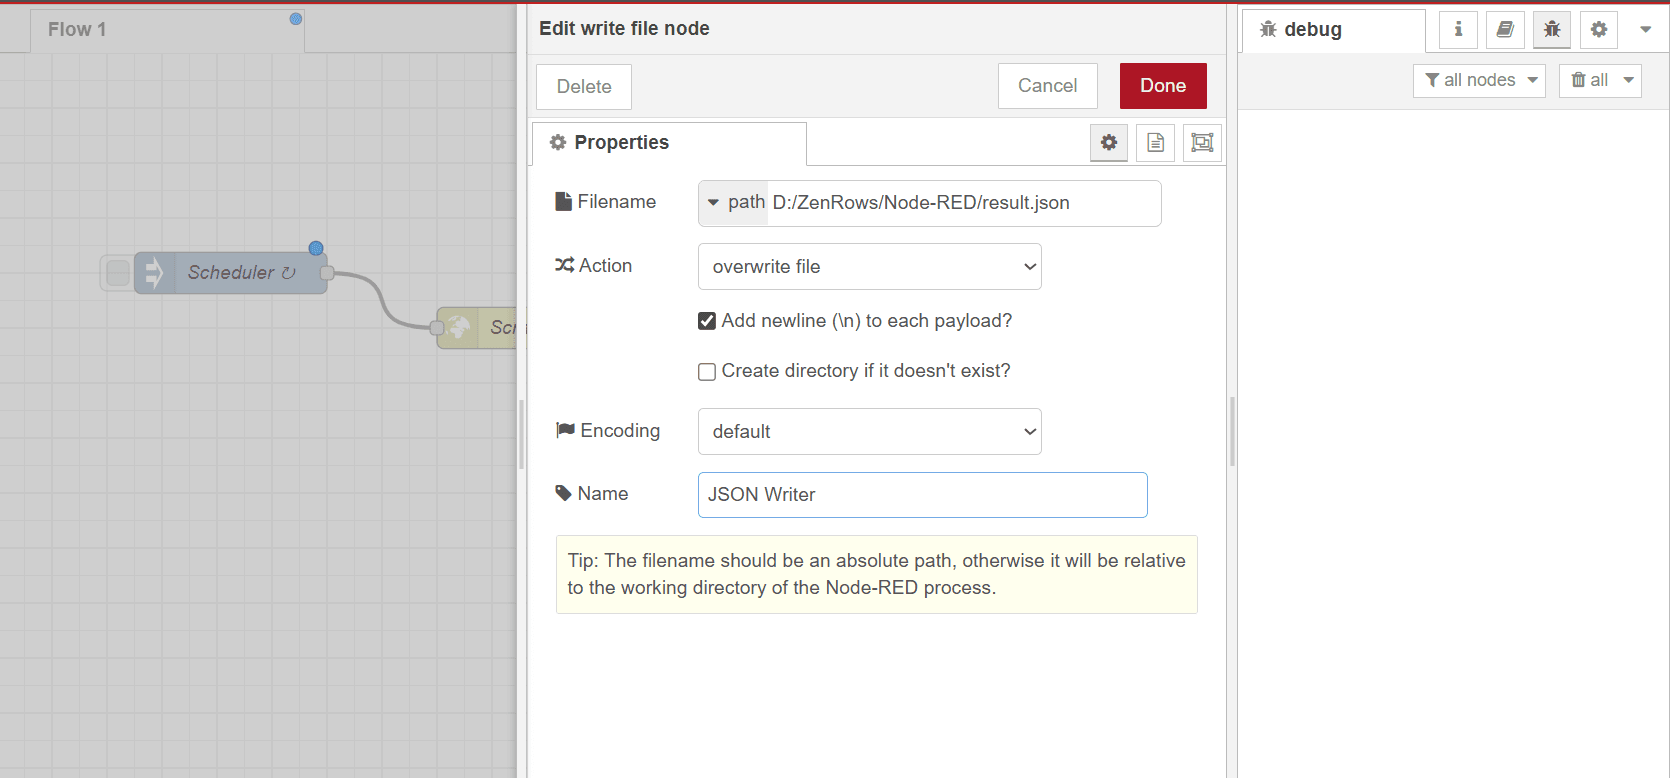
- Drag the debug node into the canvas and connect it to the file writer.
- Double-click the debug node and rename it as desired (e.g., Output Tracker).
- Leave the Output as msg and payload.
-
Click
Done.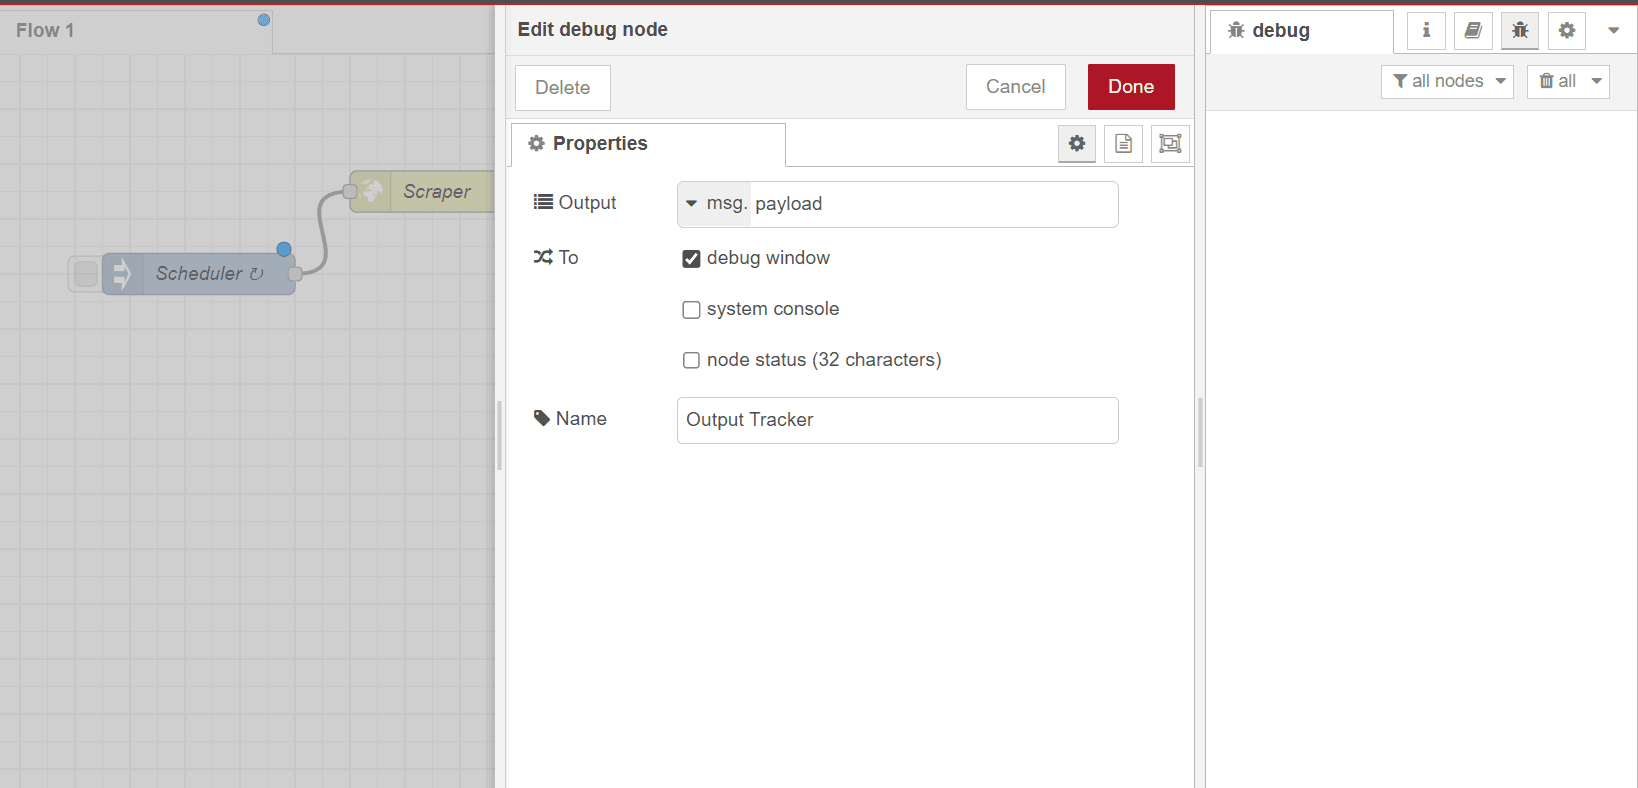
Step 5: Deploy and run the flow
ClickDeploy at the top right to deploy the flow. Once deployed, the schedule is now triggered. Click the bug icon at the top right. This displays the JSON outputs in the right sidebar for each run.
 The workflow also creates a JSON file in the specified directory and updates it at the chosen interval. Here’s a sample JSON response:
JSON
Troubleshooting
Invalid URL/flow fails to run
- Solution 1: Ensure you explicitly copied the URL generated by cURL from the Playground.
- Solution 2: Check the URL format for extra character strings, such as
cURLappended to the URL (e.g., the URL must be in the form ofhttp://…and notcURL "http").
File write access unavailable or denied
- Solution 1: Ensure you set the proper write permission inside the storage location.
- Solution 2: While specifying the file path in the write file node, you should include the file’s absolute path, including the expected file name. For instance,
D:/Node-RED-resultis wrong. The correct file path format should beD:/Node-RED-result/result.json.
Node-RED server jammed or localhost address unavailable
- Solution: Stop the running server and restart it. Then, re-open the server address on your browser.
node-red is not recognized as an internal or external command
- Solution: Ensure you’ve installed the Node-RED module globally, not in a localized working directory with
package.json.
Frequently Asked Questions (FAQ)
Can I store the scraped data from Node-RED in a CSV file or a database?
Can I store the scraped data from Node-RED in a CSV file or a database?
Yes, Node-RED has a built-in file writer node that allows you to access local and remote directories to write files in various formats, including JSON, CSV, Markdown, images, and more. Although there are no built-in database nodes, you can install them individually by clicking the menu at the top right > Manage palette > Install section. Then, search and install the relevant database module. Once installed, you can then drag the database module into the canvas and configure it for data storage.
Does ZenRows offer built-in Node-RED integration?
Does ZenRows offer built-in Node-RED integration?
No, ZenRows doesn’t offer a built-in node on Node-RED. However, you can easily connect to ZenRows via Node-RED’s built-in http request node and your target website.
Does Node-RED support AI integration?
Does Node-RED support AI integration?
While Node-RED doesn’t have a built-in Node for interacting with LLMs like
gpt-4o-mini, you can interact with them via a custom function node or use community-made nodes like node-red-openai-chatgpt, node-red-contrib-anthropic, or other available LLM nodes.